Jump to content

Photo

Baldur's Gate 2 No-Reload Challenge


  • Please log in to reply
15228 replies to this topic

#1951
Alesia_BH

Alesia_BH
  • Members
  • 4,578 posts

Shadow_Leech07 wrote...

Sorry to hear that. Fighters tend to be repetitive throughout the game, employing the same strategy of buffing and then just hit and run.


Yeah. It's not something I'd mind generally. However, with additional hit points and Potions of Extra Healing on throw away foes, it's become a little tedious. I may get back to her though.

Best,

A.

#1952
AnonymousHero

AnonymousHero
  • Members
  • 471 posts
Serena, the solo Monk:

Serena force-triggered the Suna Seni ambush by repeatedly moving between the slums and the graveyard under HiS/II. She gulped the Potion of Firebreath to eliminate the mage instantly. She moved around after gulping to make sure that the other enemies also received damage from the fire. (The potion works like a touch-range Aganazzar's scorcher in case you didn't know.).

Next, she killed Eldarin and moved a little away. Suna Seni followed and died as a result. From then on it was a simple matter of melee.

She sold off the loot and increased her reputation to 16 at a temple by repeated donations.

Various minor quests followed:

  • Returned Wellyn's teddy bear.
  • Solved the Skinner murders, but didn't pursue Rejiek down into the cellar. Serena reached level 11.
  • Helped Kamir the mournful paladin find a new ward.
  • Swiped the Ioun stone while under II. There was no way she would be able to kill the spiders, so she avoided the confrontation with Pai'Na.
  • Went to Government District to get Umar Hills on the map and to talk to Jan (and have him join for 1 second) for a little extra EXP.

Moving around, Serena finally got the second 'fixed' ambush to trigger. She took out the mage first, the healer second and then just proceeded to pummel the fighters.

Before returning Renfield's body to Rylock, Serena went back back to the bridge district to buy a potion case and an emergency Potion of Invisibility. On the way to talk to Rylock, she killed a mad mage on the way -- she used her fists and he never got any spells off (if he had succeeded in getting off Hold Person, she could always have equipped Arbane). Heading back out, she was accosted by Xzar, and agreed to help him find Montaron. She left that little quest for later.

Serena traveled to the Umar Hills (had to run from an ambush along the way) and did all the minor quests there and obtained Ilbratha. She was forced to leave the Umber Hulks alive since she didn't want to waste a Potion of Clarity on them.

Back in Athkatla, Serena beat up a couple of goons outside the Copper Coronet using Ilbratha and II (RoAC) for defense. She won easily with a few Stunning Blows. She decided to free Hendak the slave. She stealthed around to pre-emptively kill a few of the animals. Yet again Stunning Blow served well. Once Hendak had been freed, Serena purchased to Sling of Seeking (useful against non-regenerating foes) and the Sword of Flame for killing trolls.

#1953
AnonymousHero

AnonymousHero
  • Members
  • 471 posts
Serena the solo Monk:

Sensing that she might need a little backup for her future travels, Serena went to Trademeet. She was ambushed two times on the road -- once by a group with someone casting Cloak of Fear. Fortunately, she was quick enough to run away so that she wasn't in range when the "cloak" was actually finished. Anyway, she got to Trademeet met up with the mayor and agreed to help them with their problems.

She was going to talk to the genies, but instead decided to ... KILL THEM. For some reason this didn't turn the genies inside the tent hostile and Serena, regretting her decision, agreed to help them find a Rakshasa.

However, before that she'd promised to help Nalia to clear her keep of invading trolls.

As it turned out (surprise!) the Efreeti bottle turned out to be very useful for killing trolls. With its help, Serena cleared the first level of the keep, excepting the Spirit Trolls in the central room.

Having discovered what the Efreeti could do in terms of AoE damage (Fireball), Serena took a detour to the Graveyard to get Kitthix with little trouble.

Back in the keep, Serena tried to use Kitthix' Web power on Glaicas to avoid him using his potions, but he saved against the Web and forced Serena to use a few (Healing) potions of her own. Oh, well, all's well that ends well.

Having obtained all the pieces she forged the FoA (purely for the EXP gained). After doing so, she returned to the second floor of the keep and killed a few golems which gave her level 13. Unfortunately her fists were still "only" +2, so there was no real way to defeat the Iron Golem. She just looted the statues and left the golem standing around looking angry.

She went to the cellar to complete the dogfood "quest". Again, the Efreeti was helpful. Serena placed to dogfood and stealthed out -- not having any defence against the Umber Hulk confusion attack, Serena had to leave them alive.

Not feeling quite up to facing Torgal, Serena went back to Athkatla, sold off loot and paid off Gaelan Bayle. Unfortunately, the Monk cannot wear the Amulet of Power, even though the description doesn't list this restriction. (Damn these manually maintained descriptions!)

Having gained Quivering Palm, Serena went to try it out on Prebek and Sanasha (under II for safety from spell-based attack). Having thus killed the Harper organization's enemies, she gained admittance to the Harper hold and completed the rest of the Montaron quest.

As she was already in the Docks area, Serena talked to Renal Bloodscalp and agreed to help him document Mae'var's betrayal of the Shadow Thieves. She went to the Temple District to steal the Talos priestess' amulet, but ended up taking a small detour to kill a Rakshasa (using the Efreeti for a little preemptive strike to get rid of the Kobold wizard).

Anyway, Serena delivered the amulet, and agreed to help Edwin kill a rival. She killed Rayic's fire/cold mephits without too much bother (MI absorbed a little damage and she used a few minor healing potions). While killing Rayic's golems, Serena reached level 14, so she now had 42% innate resistance to magic.

However, Serena (probably wisely) decided that she wasn't up to killing Rayic at this point (he has True Sight), and so postponed the rest of the quest.

Edited by AnonymousHero, 18 July 2011 - 02:07 PM.


#1954
BelgarathMTH

BelgarathMTH
  • Members
  • 1,008 posts
Good updates, AH. I look forward to reading more about Serena. I still admire your concise writing style and your placement of screenshot links as part of your prose - that must take a lot of extra work, and you handle it with great skill.

#1955
AnonymousHero

AnonymousHero
  • Members
  • 471 posts
(Thanks, Belgarath. The rather terse style is because I'm trying to spend more time playing rather than writing prose :).)

Serena the Monk (L14):

Serena decided it was probably time to fulfill her promise to Hendak to kill the slavers in the slums.

She retrieved Lilarcor on the way. The slimes were killed (easy peasy) and just stealthed past the random spawn goblins and kobolds. The Efreeti helped kill the Kobold Shaman.

Given the efreeti ability to cast Invisibility, it was easy for Serena to stay safe while the Efreeti killed slavers. Serena used Quivering Palm for Captain Haegan in an effort to kill him as quickly as possible (i.e. before he could use his potions).

Serena went to do Mekrath's quest and helped guard the actors against various creatures, but a group of bounty hunters got them. She contemplated going after them, but decided she'd probably need to be more experienced before going.

Questing for experience led Serena to the Windspear hills, where she survived an ambush which was apparently arranged by Firkraag creating an illusion the the other party was a bunch of monsters. Serena used II as a starter, buffed up using MI and DUHM before really starting the fight. Serena returned the dryad acrons and leveled up to level 15. (This means +3 fists with 1d20 at 7/2 attacks per round and another little speed boost, though the speed boosts are hard to notice at this point. The damage increase is very noticable.) After that initial ambush Serena was helped by Garren Windspear who apparently saw the whole fight (without illusions). She accepted his hospitality, but Firkraag sent yet another party to kidnap Garren's son. The second ambush was easily dispatched too.

With her new shiny +3 fists, Serena went back to the de'Arnise keep to try them out on an Iron Golem. It didn't take much damage, but failed its save against Quivering Palm.

Serena went back to Athkatla to do a few minor quests:

  • She killed Uncle Lester in the graveyard.
  • She disrupted the operations of some kidnappers who'd been burying people alive.
  • In the sewers, she killed the Sea Troll that had been pestering Roger.
  • She went to Mae'var's guild to buy the Nymph Cloak (+2 CHA) and many of the merchant's potions.

After completing these quests, Serena went to the Temple Ruins to check out a story about a Shade Lord...

#1956
BelgarathMTH

BelgarathMTH
  • Members
  • 1,008 posts
Congrats on the magic fist upgrade.

Good luck with the Shade Lord.

#1957
AnonymousHero

AnonymousHero
  • Members
  • 471 posts
Serena the solo Monk:

Serena went to the Temple Ruins, where she did a small part of the quest: She talked to the status, obtained the Light Gem and the body of Amauna. With the help of a summoned Efreeti, she lured a few shadows and Skeleton Warriors out into the main corridor where they received a beating. She tried to cross a bridge, but was ambushed. She returned Amauna's bones, but unfortunately, she ran into a Lich soon thereafter, and decided to abandon the quest... for now.

Since Efreeti had previuosly proved extremely useful for troll-killing, Serena instead went to the Druid Grove to take care of the troll/evil druid infestation. She used the Efreeti to separate spirit trolls from the regular trolls to make them more manageable. The Sword of Flame, although almost unbearably slow, was effective for dealing the killing blow on the trolls. Serena reached level 16 at this point.

Next up was a rather large group of spiders, but they suffered the Efreeti's wrath.

There was yet more Efreeti action as Serena laid waste to the Spirit Trolls outside the troll mound.

The next significant foe was a Greater Earth Elemental, but in the end it didn't offer much opposition.

Serena then snuck past some druids fighting a few trolls (at least that's what the druids thought -- the trolls hadn't shown yet) and past a second group of druids headed up by one Kyland Lind.

She killed Ithafeer and company as a sort of penance for killing one of the Djinn. There were also some Shambling Mounds outside the building where Ithafeer was holed up.

Emboldened by her successes, Serena went back to kill the first group of shadow druids and the trolls attacking them. She also killed Kyland Lind with a precision strike. The rest of the druids were pretty harmless once Kyland had been eliminated.

Finally, Serena doubled back again to talk to the Shadow Druid Leader. On the way, encountered a group of bears and the final group of druids. Here the Efreeti served mostly for spell interruption.

When that last group of druids had been taken care of, Serena talked Cernd into challenging the Shadow Druid leader for leadership of the grove.

Serena returned Ithafeer's head and became a Hero of Trademeet. She leveled up to level 17.

Before leaving Trademeet, Serena also helped a woman named Raissa who'd fallen victim to Rejiek Hidesman and resolved a feud between two families (the peaceful way). She also bought a few items, namely, Blackbood (forged Pitchwife+5 as a replacement for Sword of Flame+1), Ras, the Cloak of Displacement (improved saves!) and the Belt of Inertial Barrier.

And with that... Serena was done with Trademeet.

Edited by AnonymousHero, 20 July 2011 - 05:05 PM.


#1958
BelgarathMTH

BelgarathMTH
  • Members
  • 1,008 posts
@AH, Congrats on completing Trademeet.

I missed your first post a ways back - I assume those extra-tough monsters are coming from SCS2?

#1959
AnonymousHero

AnonymousHero
  • Members
  • 471 posts

BelgarathMTH wrote...
I missed your first post a ways back - I assume those extra-tough monsters are coming from SCS2?

Yes, it's the "Improved minor encounters" component from SCS2, IIRC.

#1960
Alesia_BH

Alesia_BH
  • Members
  • 4,578 posts
Whatever component it is, it seems to have been adapted from Tactics. The enemy layout in the grove is virtually identical to the one in the Tactics "Improved Faldorn/Druid Grove" component.

Faldorn herself is less fearsome in SCS though.

Best,

A.

Btw. Keep up the good work Anonymous Hero!

#1961
AnonymousHero

AnonymousHero
  • Members
  • 471 posts

Alesia_BH wrote...

Whatever component it is, it seems to have been adapted from Tactics.

Yes, the spoilers for SCS2 indeed mention this.

Alesia_BH wrote...
Faldorn herself is less fearsome in SCS though.

Heh, I wouldn't know -- I never fight her. I always let Cernd take care of it :).

#1962
AnonymousHero

AnonymousHero
  • Members
  • 471 posts
Serena the Monk (L17):

Still not nearly able to get 100% MR from items, Serena bought Potions of Magic Proection and of Magic Shielding from Roger in the sewers.

To tie up a couple of loose ends, Serena went back to the De'Arnise keep, and killed a few Spirit Trolls and some Umber Hulks. She felt much safer at this point, since she could get negative saves against their confusion attack.

After that, Serena went to try her hand(s) at the Unseeing Eye quest. It turned out to be a little tricky to avoid the Vampiric Mist level drain, but she had a few Scrolls of Restoration on hand for emergencies. The general strategy of hit & run melee with Arbane's Sword worked great for the shadows and vampiric mists, though she did get a little level drained. Talking to Amaunator yielded level 18. She wanted to eliminate the shadows along the path to the disused temple, but some Beholders decided to join in the fun. Yikes! She immediately chugged a Potion of Invisibility, but that didn't stop the rays that were "in flight", and she was paralyzed. Fortunately, there was no "Anti-magic ray" in the air. That would have canceled the invisibility and probably been fatal. This was by far the closest call so far. Once she regained movement, Serena got the heck out of there.

Not fancying further encounters with Beholders, Serena went to the Windspear Hills.

She used invisibility to get past the vampires unmolested, and closed the door behind her. (Vampires in SCS II wander a lot, so it pays to box them in as best you can using doors.) She agreed to help Samia, using a Potion of Fire Resistance and the Ring of Fire Resistance for 90% fire resistance against the guardians and the guardian of King Strohm's tomb. Serena raided the tomb, but used Hide In Shadows to avoid Samia's ambush.

She went back to the main corridor and ran into some werewolves, golems, an Air Elemental and yet more golems. Serena reached level 19, which meant +2 to all saves. She also killed Tazok, but didn't fancy her chances against a mage, so left Conster and Firkraag hanging.

Having obtained the Dragon Slayer sword, the Crypt King in the graveyard could now be slain safely.

Serena went and bought the Sensate Amulet. Hopefully, its permanent Protection from Evil actually works -- at least it adds a few HP and there were no other amulets to use anyway.

Feeling that a little easy EXP was in order, Serena did the Illithium quest. For some weird reason she felt compelled to get the fake Illithium, so that's 500 gold she'll never see again. She agreed to do another quest for the temple, but didn't quite feel ready to take on the night-time vampires, so she had to postpone it.

Ever more desperate for EXP, Serena had to take on a slitghtly more risky foe, namely Rayic Gethras. Her tactics: She went upstairs under stealth to force Rayic to cast True Sight. Once he started casting, Serena hopped back downstairs and waited for it to expire. She reentered under Improved Invisibility and started just hitting Rayic. His PfMW contingency went off, so Serena backed off. She summoned an Efreet (feared by Symbol:Fear), and also summoned Kitthix (stunned and killed by a Symbol:Stun + Finger of Death combination). At this point Rayic's PfMW had run out, and Serena simply walked up to him and started hitting. Serena completed the rest of the intrigues at Mae'var's guild, but avoided the final confrontation for now.

Serena had now reached L20 from all the quest EXP. L20 means HLAs, so she picked her first HLA: Dragon Fist. (Basically a version of Breach which requires melee range. It has all the same limitations against invisible characters, Liches, etc.) Even though this would mean that the stances would be delayed by one level-up, she felt it would be necessary to have some better way of dealing with mages.

#1963
BelgarathMTH

BelgarathMTH
  • Members
  • 1,008 posts
Good work, AH. Very exciting and interesting reading. When I start back to work next week and don't have as much time to play, reading these updates will help me get my daily BG fix. :)

#1964
Grond0

Grond0
  • Members
  • 6,498 posts

AnonymousHero wrote...
Feeling that a little easy EXP was in order, Serena did the Illithium quest. For some weird reason she felt compelled to get the fake Illithium, so that's 500 gold she'll never see again.

Why is that weird - doesn't it make sense to do it that way round so that the illithium is available to upgrade equipment?

By the way, nice escape from the beholders!

#1965
AnonymousHero

AnonymousHero
  • Members
  • 471 posts
She's a solo monk... so she can't use any of the equipment which Illithium can be used for (in my install, at least).

#1966
Grond0

Grond0
  • Members
  • 6,498 posts
Thanks for the clarification. I haven't used Cromwell much and never got to Cespenar at all, so I've probably got an inflated idea of how much they can do!

#1967
AnonymousHero

AnonymousHero
  • Members
  • 471 posts
Serena the Monk (L20):

At her current level, Serena felt much more comfortable about the thought of taking Torgal on, although she did it in a slightly cowardly way (shutting the door) to avoid getting overwhelmed. Immunity to slowing should also be enough to guarantee safety in case things went south. Torgal fell and the Efreeti got the killing "blow".

With a litlle DUHM and Quivering Palm, Serena with an AC of -7, was able to beat the remaining trolls even though she had been drained of a little strength.

Serena reported back to Nalia and did the stronghold quests in rapid succession. From this she gained a new level (21), a new HLA (Shadowless Kick, prereq. for stances) and a pair of Boots of Grounding (purchased from Bolumir the priest in the stronghold).

Ever hungry for more EXP, Serena went for the second half of the Unseeing Eye quest. The beholders would still be off-limits, but the Unseeing Eye itself is a pure spellcaster, so the only danger would be the Guath guarding the final piece of the rod. Since Gauths don't have anti-magic rays, and given Serena's saves, buffing using Improved Invisibility (RoAC) should be sufficient.

Serena:
  • Killed the mummies and ghasts en route to the Beholder's lair. She used Arbane here for complete safety against the ghast "hold" effect -- her saves might have been sufficient, but she wanted to preserve her single cast of Improved Invisibility for later and didn't want to take any chances.
  • She buffed and killed the Gauth guarding the missing rod piece.
  • She summoned the Efreeti at the place where the Unseeing Eye would appear.
  • She picked up the second rod piece and equipped it.
  • Once the Unseeing Eye appeared, she waited for its buffs to "fire", used the rod and killed it with a single blow.

She reached level 22 here. HLA pick: Tiger Strike (prequisite for stances).

The completed Rift Device was returned to Amaunator, and Gaal was dispatched before Serena returned to the Temple of Helm.

#1968
BelgarathMTH

BelgarathMTH
  • Members
  • 1,008 posts
Great run against the Eye, AH. I see you have a lot of memorized knowledge about exactly which eye beams come from exactly which species of beholders. I don't think I could ever remember all that like you do!

I had a lot of trouble last time, mainly I think because I was using the rod before the Eye's buffs finished firing, which meant I was facing it buffed. I also had forgotten at the time that it used mage spells instead of eye beams.

#1969
corey_russell

corey_russell
  • Members
  • 5,300 posts
Lotan the human fighter (for now) entering the challenge

Lotan is entering the challenge. He had 3 other bhaalspawn friends and they survived BG 1 and they are starting with him in Irencus's dungeon. As usual, during the import process, BG 2 messed up the HP. Lotan was exactly right, Joshua's was grossly wrong (like 46 but supposed to be 72), Hanna was 7 off, and Paja's was actually too much. I put them all what they were supposed to be via shadowkeeper.

Here are their starting stats:

Lotan the Human Fighter
Joshua the Inquistor
Hanna the cleric of lathander
Paja the mage/thief

As good probably be guessed, Lotan is dualing soon (next level in fact), to a druid. Here is my setup:

Vanilla BG 2
Throne of Bhaal expansion
Official Throne of Bhaal patch
Core Rules
"gore" on (means characters can be chunked)

Hopefully no foolish mistakes this time...only time will tell.

Edited by corey_russell, 26 July 2011 - 01:10 AM.


#1970
ussnorway

ussnorway
  • Members
  • 2,350 posts
Good luck in BG2 corey_russell!

p.s.
I still say Hanna needs a higher charisma score.

#1971
corey_russell

corey_russell
  • Members
  • 5,300 posts
Well, since Joshua has 18 charisma, I will go ahead and give her the ring of human influence, giving her 18 CHA - does that make you happy? :)

And thanks for the good luck...

Edited by corey_russell, 26 July 2011 - 06:37 AM.


#1972
corey_russell

corey_russell
  • Members
  • 5,300 posts
Lotan the Level 9 Fighter (inactive) > level 6 druid continued adventures...

Well, the party made it out of Chateau Irenicus, but something very embarrassing happened in the process - Paja was killed by the mephits guarding the genie! The whole party except Lotan got stunned, and she falling just too fast, even Bhaal power heals couldn't keep her alive. The party avenged her but we had to leave some loot behind. This also meant we had to recruit Yoshimo until we could resurrect her.

After leaving Chateau Irenicus and seeing his fight scene and the abduction of Imoen, Hanna is now level 9. She has 1 level 5 slot, and promptly memorized raise dead to be ready to raise Paja. But first we sold our junk and kicked out Yoshimo. We then rested a few times to get everyone back up to speed.

While I love to get Mencar early, I'm concerned about our damage dealing ability at this point (no cloudkill), so decided to wait till Paja has 2 level 5 slots and then we will deal with them.

We investigate the circus and solving the genie's riddle on the bridge gives Lotan level 9 - he promptly duals to a level 1 druid - yay! He has no armor at all yet, that he can wear as a druid. Freeing Aerie put him at level 4 though, which was enough to memorize barkskin. I also memorized armor of faith, then we entered the shadows/illusions area. Thanks to Joshua's True Seeing, very straightforward battles here. We confronted Kalah - took us a little while with our inferior damage dealing, but he fell also giving Lotan level 5 and access to call lightning.

We head to Adventerer's mart and try to buy some cheap stuff for Lotan, such as studden leather, buckler and a +1 scimitar. At least till he gets his fighter levels back, will try to keep him using his sling.

We head for the slums, met Gaelen Bayle, he didn't mind giving us some things he didn't need. Also met a rather confrontational 2 thugs - again took us a while to kill them, but kill them we did.

I didn't want to trigger Nalia's quest just yet, so we headed for the docks. When we next hear from them they will investigate the thieve's guild.

#1973
Carinna

Carinna
  • Members
  • 192 posts

corey_russell wrote...

Paja was killed by the mephits guarding the genie!


It's that wisdom of 5.  Since you're apparently using your family's pictures for the characters, do they know you've given them such low scores?  Or was it deliberate on your part?:ph34r::devil:

:D^_^

And do you really own a suit of armor or is that photoshopped?  (Sorry if you've already answered these questions way back when. )

#1974
corey_russell

corey_russell
  • Members
  • 5,300 posts
On some of my family's characters, when their key stats were high enough, I let the other stats slide. Although I do think I messed up Paja's stats, I should have made her strength like 9 and put the rest of the points into her wisdom, forgot someone needed to be decent at lore.

My family doesn't realize their stats.

The pictures are not photoshopped. The gauntlets, shield and sword are all plastic toys. To "pretend" I had leather armor, we used the back of my wife's leather jacket.

#1975
corey_russell

corey_russell
  • Members
  • 5,300 posts
Lotan the Human level 9 fighter > level 10 druid continued adventures...

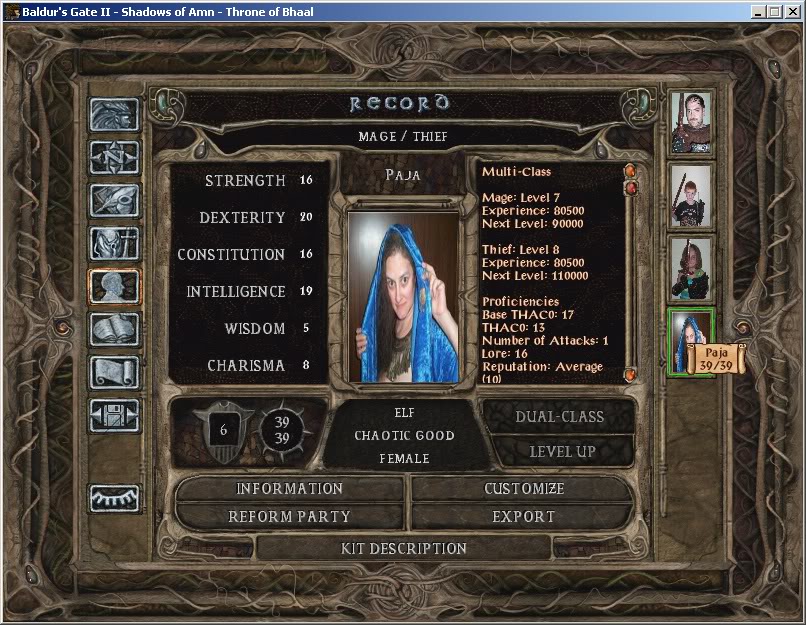
Lotan and his party of Joshua the inquistor, Hanna the halfling cleric of lathander and Paja the elven thief/mage continue their quest.

While selling the thieves their own stuff back, we noticed the thief's fence had an ice storm spell. I usually don't use this, as most times cloudkill is more effective however at this point in the game, Paja can't cast  level 5 spells yet. However, she could cast ice storm x2. Combined with 3 fireball slots, and 3 glyph wards by Hanna, I think we have enough damage to take down Mencar Pebblecrusher and get his full plate for Joshua.

So after getting the spell, we head back to the Seven Vales and change our spell set and rest. We head upstairs, and started firing off lots of disabling spells - web, entangle x2, glitterdust etc. Then poured in the damage spells. Bennan Risling had enough and fled, we couldn't do anything about it though (we didn't even see him, maybe he was invisible?). As long as we get Mencar's full plate, we can live with that. But then the battle started taking a turn for the worse - one of the mages cast a chaos (I think) and 3/4 the party failed their save! Yikes! And just as bad, Mencar finally broke free and starting charging the party. If he had charged Lotan it would have been over right there. But understandably he attacked Paja, as she did almost all the damage to him. Hanna was the only one free at this point. She tried hold x2 but Mencar saved each time. She had no choice but to sling away. For some reason, Mencar was missing Paja a lot (she didn't have any stoneskins up as she had to use level 4 slots for ice storms - not to mention we don't have a license yet). Mencar however killed Paja eventually. Fortunately almost the moment he did, the party shook off their chaos and targeted Mencar. Still took a little bit to kill Mencar, but thanks to two insects casts by Lotan Mencar finally fell.

Unfortunately I had forgot to sell before doing this battle and had very little looting room. I can't open the chests since they are locked (tried to force them but failed). So was no choice but pay the cash to resurrect Paja so she can help us loot. As it turned out, there ended up not being much loot - Brennan ran as described earlier, and the mage was somehow chunked and didn't have his cloak of non-detection that he usually wears. So we only got Orcslicer's and Mencar's stuff. This was good enough - the fight got Lotan a level so was well worth it.

Ina n ambush Paja got level 9 - access to cloudkill yay! (only 1 level 5 slot, but still that's a start). The mage in said ambush dropped a lot of spells, so Paja started memorizing and got level 9 for Joshua - Joshua FiNALLY got a decent HP gain (12) putting him at 84. This was welcome news.

We agreed to help Bloodscalp with his "guild" problem. One of the tasks was to deal with a Cowled Wizard. I must have sold the fire resistance potions along the way that you get from the thieve's guild, so had to use my party to clear the mephits - the party gulped MANY heal potions. Next up was the golems but made a rather bad blunder - I forgot the haste the party. We go upstairs and Hanna and Joshua are taking a HUGE beating, gulping many heal potions. Even so, both of them had to flee to avoid being chunked at different times. Fortunately no one died.

As for Rayic Gethras, we gave Joshua as many anti-mage buffs as possible and had him deal with Rayic. He succeeded taking minimal damage.

We did all the quests for Maevar, and also found the evidence Renal required and gave it to him. However, I did NOT feel comfortable dealing with Maevar just yet, everyone needs more AC, that much is clear after facing the stone golems.

So we battled the pirates in the Seas Bounty since Joshua is immune to charm. We used a LOT of spells here, battle raged for a while, but thanks to Lotan's insect plague the result was never in doubt.

A shield for Joshua would be a logical way to increase his AC. However, he doesn't have a good 1 hander at this point. He has ** Axe so I figured we finally would enter the Copper Coronent. The stonefire is available after freeing Hendak. The party freed Hendak without any trouble, mainly because Paja scouted ahead and saw the beastmaster and fired a web and cloudkill. Once he was dead we dealt with the beasts one at a time. I got a nice suprise after talking to Hendak - Lotan got level 10 and got his fighter abilities back! Yay!

At this point I remembered Droth the slaver has full plate - I wondered if I would take down Captain Haagen would he turn hostile so we could get it? Then Lotan would be pretty well protected to help Nalia. So we got rid of the slavers in the ship -initially I had his script use the +2 staff from Rayic, but Lotan got poisoned by a trap AND  held by a slaver mage! And worse, he was targeted by about 4 slavers! Things were looking bad, Joshua laid on hands, Hanna cured his poison and did her biggest heal, and Paja fired a fireball into the slavers and moved up to remove the trap. After healing Lotan, Hanna fired off a holy smite, and Joshua charged. Lotan managed to survive, but I took this as a "warning" - changed AI script to be ranged. He has the sling of seeking and good strength so that should be good enough.

I always have a thief of the party try to backstab one of the Yuan-tis since it's pretty "safe" - Paja got a much better backstab that any of my PCs every do here - she chunked it! The rest of the slavers here were dealt with without further incident.

After selling our junk and reporting to Hendak, I realized we could finally afford a good shied for Joshua. But before we left, got the Stonefire for Joshua as planned. Then we confronted Droth. He would not turn hostile (via dialog) so just force-attacked him. Hanna fired off a hold and Lotan a dooom and that held him, making him pretty easy to take down. The full plate went to Lotan.

Time to get a shield for Joshua - we could just barely afford a Fortress Shield. This put Joshua's AC at -8, now he's ready for the trolls.