Jump to content

Photo

Baldur's Gate 2 No-Reload Challenge


  • Please log in to reply
15228 replies to this topic

#15001
Jianson

Jianson
  • Members
  • 377 posts

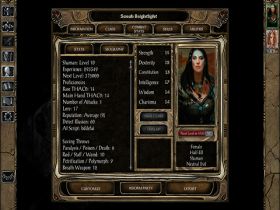
Martha, level 13 half-elven Totemic Druid, adventuring in Chapter 2 with Jaheira, Minsc, Yoshimo, Aerie and Cernd


The outdoor areas and the troll mound weren't much of a problem, although the myconids piled up on the eastern bridge. Letting them spawn this many does indeed give more XP, but the reward-per-effort sucks. These guys hit hard and cause confusion unless you protect yourself. For the ones closer to the Grove, I found it best to just let Aerie wand-Fireball the spore colonies from off-screen.


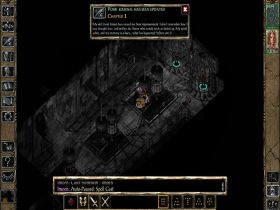
We rested in the tower to the east.


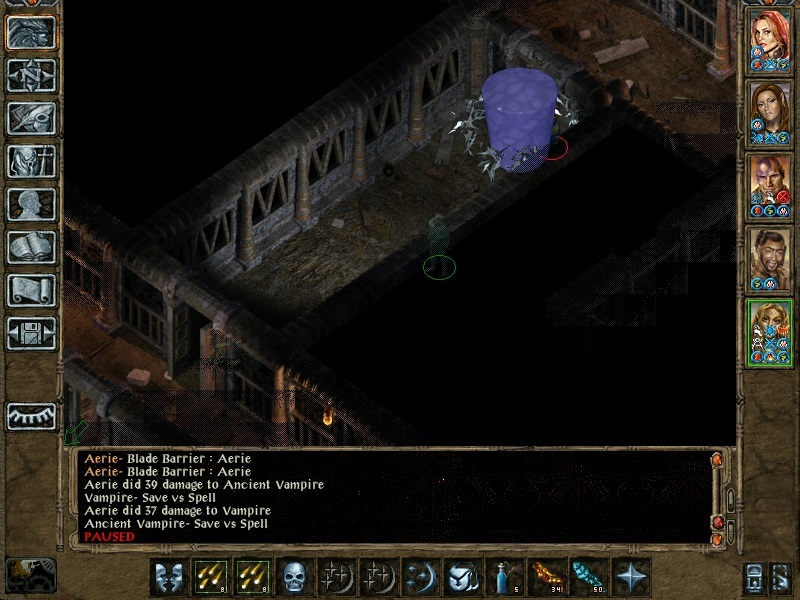
The last batch of druids put up a pretty good fight, mostly by summoning some strong help, just as I had done. Here is the mopping-up carnage:


Martha179%20carnage_zpso6phl2mx.jpg


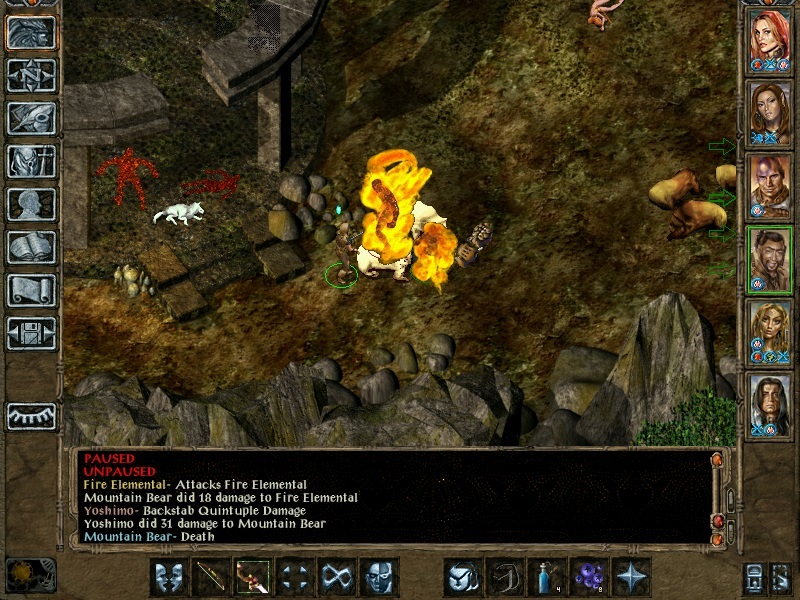
I'm starting to like the aTweaks Call Woodland Beings spell, now that Martha has reached highest tier the spell offers: summons a Nymph and four Hamadryads. The Nymph lacks some of the powerful spells the vanilla version has (Confusion, Hold Monster, Hold Person, Mass Cure) but she has better AI.


BTW, we found the Horn of Valhalla in the Troll Mound.


When the time came to challenge Faldorn, Martha was level 13 while Jaheira and Cernd were level 12. I buffed Cernd with oil of speed, Remove Fear, Chaotic Commands. Problem was, Faldorn did not accept his challenge. It isn't for this part you need to be level 14, is it? Confused, I let Martha talk to her. A new option opened up. "Great", I thought. "I assume you will now let me pick the challenger, right".


Wrong.


Martha suddenly found herself in the pit!


Oh crap, she is not prepared AT ALL! Iron Skins are up but that's about it. Cernd was the one that had conserved all the good spells in the last few battles. Martha's remaining spells were a mish-mash at best. Since I wasn't expecting to be in the pit, I decided to allow myself to cheat (within what the game allows, of course) in the fight if I had to. 


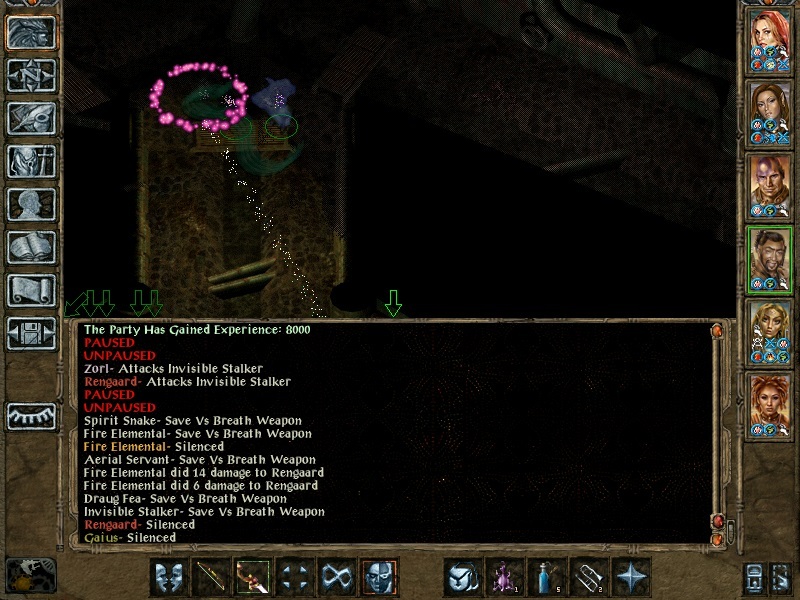
What to do first? I decided to summon my only remaining spirit animal. Got a wolf, which was good because it can do this:


Martha180%20starting%20wolf_zpszjjvohuv.


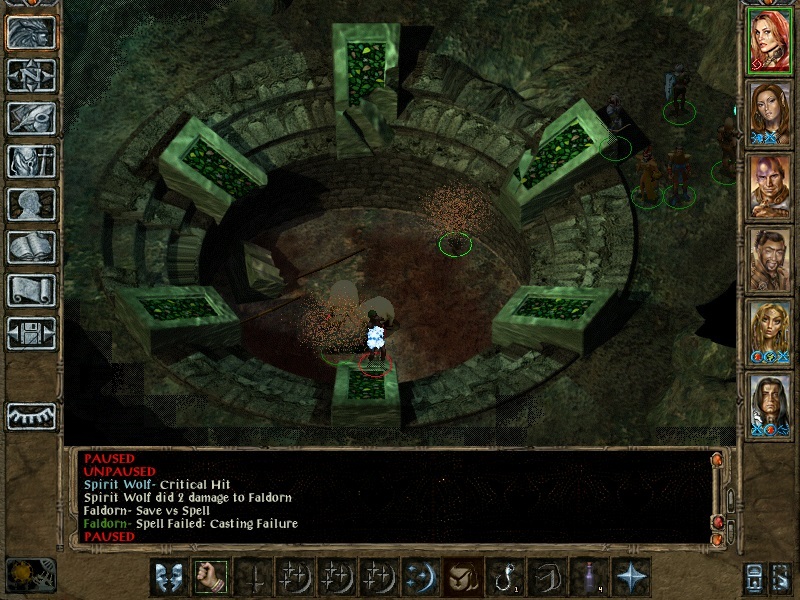
That Insect Plague had Martha running for a few rounds, and she couldn't stop Faldorn from succesfully casting Conjure Animals followed by Call Woodland Beings (she only got a Nymph). No way I can win without cheating here, those bears are super nasty and will be around for a long time. 


Martha drank an invisibility potion. The above screenshot is from just after that. The Nymph got summoned before the spirit wolf died. While waiting for those 3 summons to expire, one of my party members picked up Martha's equipment and tossed it down to her. She cast Goodberries and ate some of them to heal up. Wondrous Recall + Iron Skins were also cast.


Next part of the fight started with a Doom from each Druid. Martha called out the level 5 berserk warrior from the Horn. Faldorn did 2x Animal Summoning I, producing a quartet of dogs. Martha shot her Wand of Fear twice. Faldorn saved both times but the dogs scattered a bit:


Martha181%20panicky%20wolf_zpsymwv4lmu.j


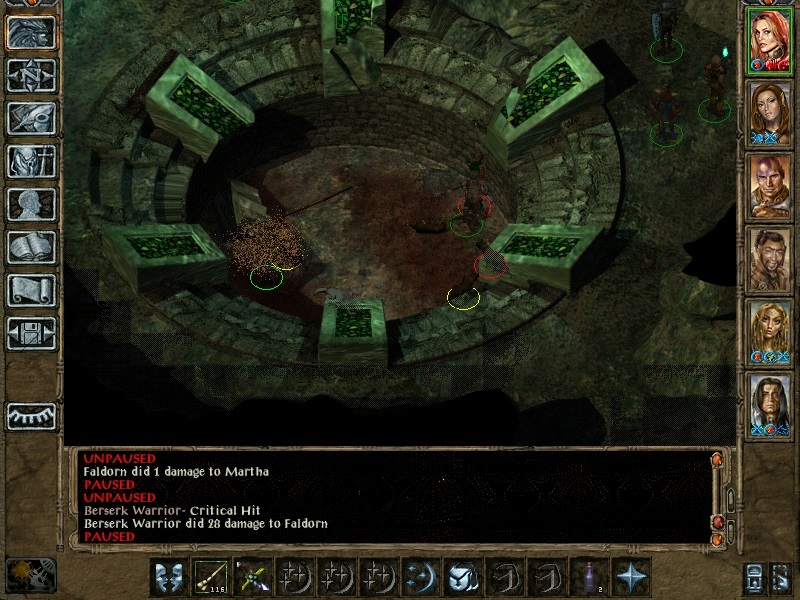
Yes, there were more of those annoying insects nibbling at Martha and eating up her Iron Skins.

As you can see, the warrior did a good job, at least after he killed the first wolf.


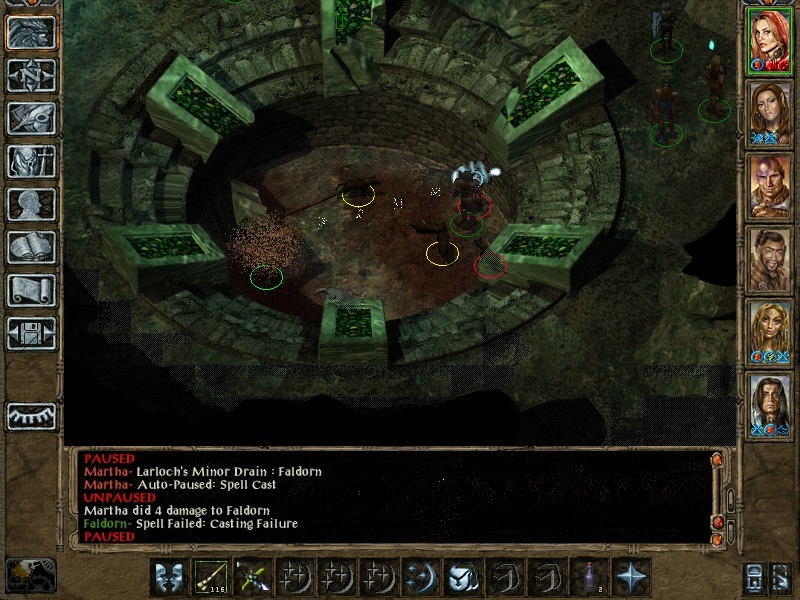
New spell on the way. Even though Martha was Miscasting, why not at least give interrupting Faldorn a try? Ah, good old Larloch's:


Martha182%20interrupted_zps6evw8cah.jpg


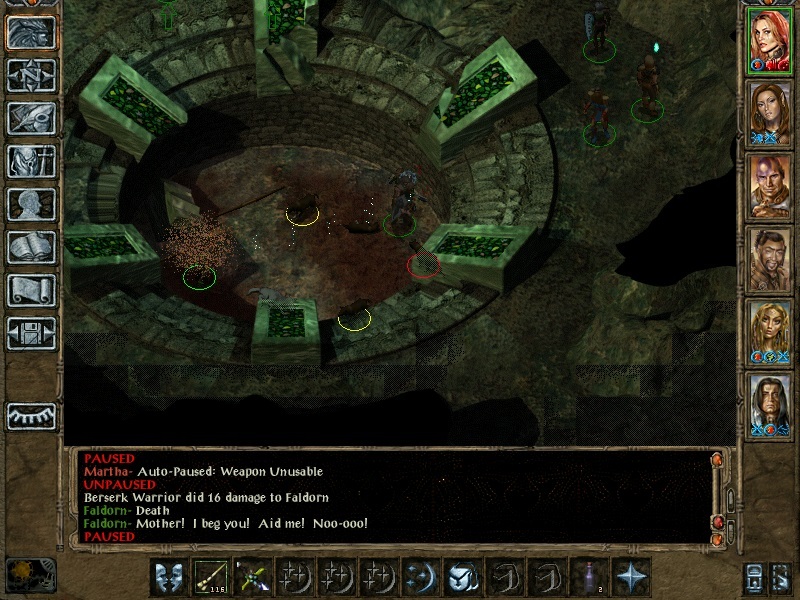
That warrior was MVP in this fight:


Martha183%20death%20of%20F_zpsw1v3jgad.j


(BTW, I wasn't the only cheater. Early on, Faldorn drank an extra healer after the wolf had hit her a few times.)


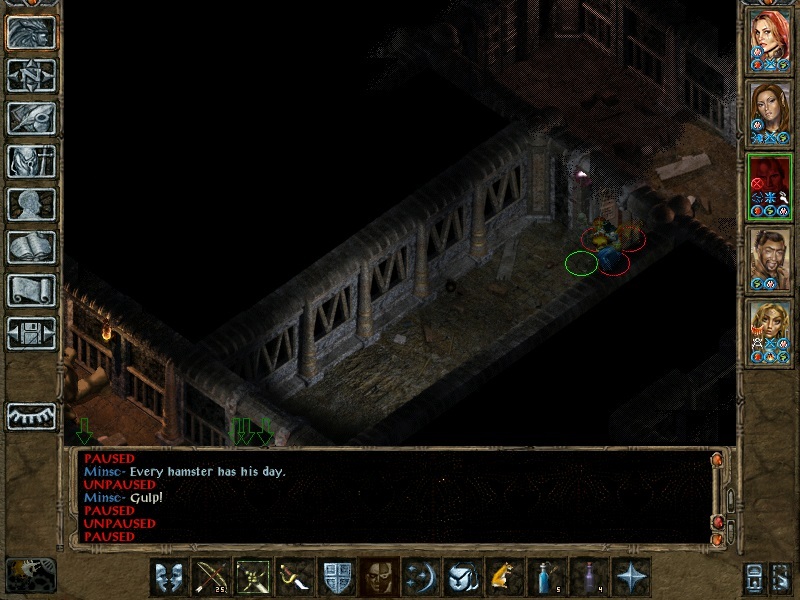
We defeted the troll druid Neithiri, then returned to Trademeet for our rewards and a few more quests. Went back to the Promenade in Athkatla. When we arrived, Dermin talked to Jaheira and the next vamp/thief encounter happened:


Martha184%20vamps%20again_zpsvobrsxuo.jp


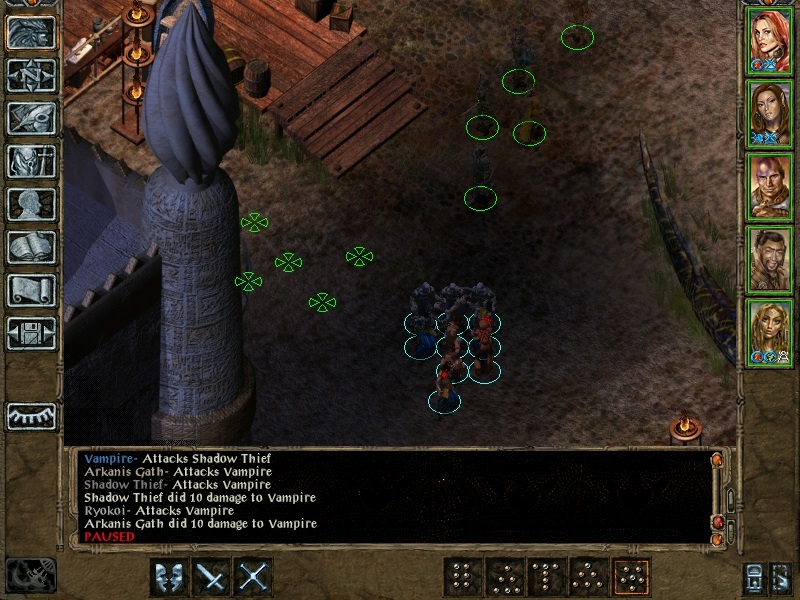
Six vampires vs three thieves, and the thieves won easily. They all seemed to be hasted and having level drain protection. I dared not interfere until only one vampire remained. Minsc got the killing blow for 8500 exp.


We purchased some nice stuff:

- necklace and ring of protection

- scrolls of Breach and Summon Nishruu

- a 40-pack of Arrows of Dispelling


We also let Maheer upgrade the Horn of Valhalla twice.


  • ussnorway, Serg BlackStrider, Grond0 and 3 others like this

#15002
Grond0

Grond0
  • Members
  • 6,498 posts
Phantasmic 6 {52} - monks party (update 1)
 
The monks made their way through the dungeon relatively untroubled - getting up to level 8 in the portal room.  
Spoiler
They managed to kill Ulvaryl by surrounding her while the battle mage damaged her with magic missiles before Spectre finished her off with the potion of firebreath.
 
They didn't muck about at the circus, but went straight for the kill with Kalah.
Spoiler
 
After reporting to Gaelan Bayle they sorted out the Copper Coronet before going to the Graveyard.  
Spoiler
They didn't use PfU scrolls in the tombs, which made for pretty hard going (their fists don't count as magic weapons yet).  However, they used stealth attacks and eventually finished everything off.  Downstairs they bounced in and out of Pai'Na's nest a few times to deal with her.  
Spoiler
They tried to clear the Southern tombs as well, but the Vampyre reacted to a scroll of PfU by taking rat shape and going invisible.  With no-one immune to domination yet pursuing that battle was too dangerous and the monks just left the area for now.
 
Leaving the Graveyard stealthily the monks triggered the Suna Seni ambush and got out of sight before a cleric used detect invisible.  A horror made several of the opponents run and despite having to endure several backstabs the monks triumphed fairly easily.  The mage had been scared and was the last to become visible, but was stunned before being able to cast a spell.
Spoiler
 
After resting the monks travelled to the Docks where they came across the same thieves that ended the last run.  This time Chimera stayed well out of the way as a critical backstab could kill any of the group and everyone survived the attacks, although Spook would have died to one backstab if it had been a critical.
Spoiler
There was more use of stealth to clear out a pirate hide-out
Spoiler
before Sansuki was left to fight some vampires alone.  Finally they reported in to Mae'Var and set off in search of a necklace.
 
On the way they ran into Renfeld.  That battle looked like being easy when 3 of the 4 enemies fled in horror.  The cleric revived two of them with a remove fear, but the mage died as he cast a failing charm person spell anyway.  
Spoiler
The thief was already in the shadows and stayed there despite still being scared - his eventual backstab would have been fatal to Phantom if it had been a critical - but it wasn't.
 
Back at the Docks they returned Renfeld and then sorted out Prebek & Sanasha in order to do Xzar's quest.  That finally got them up to level 9 and they finished it off neatly by englobing and stunning Lucette before she could disappear.
Spoiler
 
Stats (cont. from BG1)
Chimera - L9, 55 HPs (incl 5 from ioun stone), 139 kills
Spectre - L9, 60 HPs, 255 kills, 1 death
Phantom - L9, 72 HPs, 171 kills, 0 deaths
Wraith - L9, 71 HPs, 148 kills, 0 deaths
Spook - L9, 78 HPs, 164 kills, 0 deaths
Spirit - L9, 59 HPs, 166 kills, 0 deaths

  • ussnorway, Serg BlackStrider, Blackraven and 1 other like this

#15003
Grond0

Grond0
  • Members
  • 6,498 posts
Phantasmic 6 {52} - monks party (update 2)
 
The first action of the session was to go after Rayic Gethras.  The golems there could have been difficult, particularly with only 3 weapons that could hit them.  However, I successfully separated them and won pretty easily.
Spoiler
Rayic was then too slow to see the danger he was in.
Spoiler
 
The monks collected evidence against Mae'Var, but didn't fancy trying to take him on at the moment.  Instead they went to the Bridge District where they picked up the berserker horn.  The beserker was set up with the intention to take a backstab from a rune assassin following a monk upstairs - only they wouldn't follow.  I didn't fancy taking on all the enemies downstairs at once, so left them for now as well.  They did though complete the encounter with the kidnappers and go on to pick up the pantaloons.
 
Further work in the Bridge District included a comfortable victory over the Fallen Paladins.  
Spoiler
They also bounced in and out of a warehouse a few times while taking on Dracandros & co.  
Spoiler
They also did the Sir Sarles quest, but just failed to finish off Neb before he disappeared.  The others then left the house, leaving Spook to set himself up for a backstab (as he has the greatest HPs) before finishing off Neb.  
Spoiler
Spook was then the nominated target once more as the monks recovered the Dawn Ring without trouble.
 
Returning to the Copper Coronet they dived down into the cellars and quickly recovered Lilarcor.  In the slaver ship a stealthy assault killed the cleric
Spoiler
and they quickly finished off the remaining guards and Captain Haegan.  The trolls were killed with a potion of firebreath as the one Sword of Flame owned would have no chance of beating down their SCS improved regeneration.  
Spoiler
The mages and remaining guards then followed them.  
Spoiler
I was originally intending to go back out the back way, but as no-one had taken much damage decided to go through the poison trap.  That nearly proved fatal for Wraith when I was surprised to find 2 guards still down there.  In the distraction of dealing with them without anyone straying unintentionally into the trap, one of them hit Wraith with a critical and Chimera had to go through the trap himself and cast slow poison on her just in time (he had already boosted his very poor HPs with vampiric touch before realising the guards were there).  
Spoiler
Outside, the badly battered crew managed to kill the guard - despite him having the ability to enrage to defeat their stunning blows.
Spoiler
 
With reputation now up at 20 and prices at rock-bottom, the monks shopped till they dropped (or at least until they had spent the 48k gold in their purse).  Then they took on Mencar's party.  Kitthix webbed Brennan to stop him getting away, before they were lucky in stunning both the mage and his familiar.  
Spoiler
That should have led to a clean finish, but after Spirit had been hit by a critical and run away I tried to get her to attack with her sling, but the weapon transfer didn't take effect and she rushed back close to Mencar - who instantly turned away from his target and made her the first monk to die in BG2.  
Spoiler
There were no more mistakes in running Mencar round though as they finished things off.
Spoiler
 
After using the freshly-bought RoR to bring back Spirit the monks are resting up considering what to do next - I suspect things will continue to be hard work for them for the foreseeable future.
 
Stats (cont. from BG1)
Chimera - L9, 55 HPs (incl 5 from ioun stone), 153 kills
Spectre - L9, 60 HPs, 272 kills, 1 death
Phantom - L9, 72 HPs, 189 kills, 0 deaths
Wraith - L9, 71 HPs, 168 kills, 0 deaths
Spook - L9, 78 HPs, 181 kills, 0 deaths
Spirit - L9, 59 HPs, 176 kills, 1 death

  • corey_russell, ussnorway, Serg BlackStrider and 1 other like this

#15004
Grond0

Grond0
  • Members
  • 6,498 posts
Phantasmic 6 {52} - monks party (update 3)
 
Setting out for Trademeet the monks had a hard fight on the way with the orogs.  Their enrage ability, plus the supporting mage and quality archers turns that into a serious battle with SCS and the monks took significant damage even after all using their lay on hands abilities.
Spoiler
 
Arriving at Trademeet a sneak attack put paid to Taquee.  
Spoiler
The berserk warrior had been put in the tent already to cause a distraction before the monks (other than Chimera) stealthed in to finish the job.  
Spoiler
They bought Blackblood to help kill trolls before moving on to the Druid Grove.  Even with that and 2 Swords of Flame it wasn't easy to kill trolls though and they had to bounce back to Trademeet a couple of times before they had worked through the first large group.  With a bit more room to work with though progress after that was much more rapid - with the efreeti claiming most of the troll kills.  Moving on they made a rare use of missile weapons to keep out of reach of Kyland Lind and his druids while summons tanked them.  
Spoiler
They killed the remaining enemies, except for the rakshasas (in case they want to buy any potions in the future).  As Cernd stands no chance fighting Faldorn outside the party I reluctantly recruited him in place of Phantom (dumping the latter in the rakshasa house so he couldn't complain and leave forever). 
 
Cernd's first attempt at the battle saw him successful with an insect plague.  Although afflicted by creeping doom in return his werewolf form was about to kill Faldorn when she cheated and took a superior healing potion.  After a use of the RoR he tried again and once more had Faldorn at near death, only to suffer a morale failure when he still had plenty of HPs left!  Getting fed up with that, on the third try I retaliated against Faldorn's use of a healing potion by chucking a couple of those to Cernd in response - allowing him to survive and finish her off.
Spoiler
 
After picking Phantom back up the monks returned to Trademeet and got their reward.  They added an extra gloss by clearing the tomb while they were there (taking them to level 10) and helping out Tiris.
 
With potions starting to clog up their inventories a bit, the next stop was Watcher's Keep.  They intended to loot the side rooms, but found when drawing some trolls back to the entrance lobby that one of those headed straight for the main door and opened that to let in some vampiric wraiths - time for a quick exit!
Spoiler
 
With their experience on managing trolls an obvious next destination was de'Arnise Hold.  That went as smoothly as could be reasonably expected - until it didn't:
- the first yuan-ti mage was stunned by a mass stealth attack.
- the iron golem was finished off with stealth attacks using the blade of Roses.  It's ability to target gas clouds on retreating monks even after they were stealthed was a worry, but their saving throws against death are pretty good and no-one was poisoned.
Spoiler
- after resting to deal with lightning damage Glaicas failed to survive a stealth attack.
- after placing their food, the umber hulks were drawn out one at a time by stealth shots.
 
TorGal's group was attacked from distance to try and break them up.  The monks successfully got the umber hulk elder on its own fairly quickly and after a number of attempts did the same to one of the yuan-ti mages.  TorGal arrived though when they were pulling a spirit troll and they all ran upstairs.  A number of various sorts of trolls followed, but they were easily enough split up and defeated in a running battle.  The other yuan-ti mage had also followed, though I didn't realise that initially.  Fortunately a character in stealth saw it in a corridor - that should have allowed a general ambush, but after the monks had rested the yuan-ti mage had disappeared into invisibility.  By that stage I'd been playing quite a while and didn't plan the attack properly - resulting in one of the most dangerous moments of the run to date when half the monks were confused by a chaos.  The others tried to protect Chimera, who was one of those confused, with the result that Phantom was struck down by friendly fire.  
Spoiler
Then, despite Spirit's attempts to offer herself as a target, Chimera was fixated on killing Wraith.  
Spoiler
Spectre had previously stunned the yuan-ti mage, but on his own hadn't been able to follow-up.  However, with the chaos now expired the yuan-ti mage had finally had its chips the second time it was stunned.
Spoiler
 
After putting the RoR to use the monks tried a general assault on TorGal - now on his own downstairs - with the aim of finishing him off quickly.  However, he was putting in some vicious attacks and his Cloak of Fear was also a pain.  
Spoiler
That resulted in a switch to a missile-based strategy, which eventually brought him down.
Spoiler
 
As further progress is likely to continue to be a struggle Chimera did actually accept the offer of the stronghold, in order to access a bit of additional XP.
 
Stats (cont. from BG1)
Chimera - L10, 62 HPs (incl 5 from ioun stone; 5 from amulet), 176 kills
Spectre - L10, 62 HPs, 305 kills, 1 death
Phantom - L10, 74 HPs, 231 kills, 1 death
Wraith - L10, 73 HPs, 179 kills, 1 death
Spook - L10, 80 HPs, 215 kills, 0 deaths
Spirit - L10, 61 HPs, 192 kills, 1 death

  • ussnorway, Serg BlackStrider and Dyara like this

#15005
Grond0

Grond0
  • Members
  • 6,498 posts

Trio no reload (#1 - update 9)

(Grond0, corey_russell, Gate70)


After closing the previous session by taking out Thaxy, today's session started by doing the same to Firkraag.  Giving him a bit more respect, Miseri laid all 7 possible traps under his claws and the traps did the bulk of the work as Firkraag died of accumulating poison damage a few rounds later.

Spoiler


After forging two sets of dragon armour the final target in Chapter 3 was the Guarded Compound.  There was a brief moment of concern at the start of that when Ragemage released a stinking cloud and web sequencer a bit too close for comfort and Miseri got stuck.  

Spoiler

However, Ragemage and Forem had their weapons spinning and the attackers died.  There was another brief moment of concern near the end of the battle when Ragemage was stunned, but once more the attackers died before they could take advantage.  

Spoiler

That left only Sion and Stalman left - and this time the defenders died :D.

Spoiler


After taking ship to Brynnlaw the trio soon sought out Perth and used his wardstone to open a path to Spellhold.  Miseri got a level there as a result of defeating Bhaal in a dream and the experience of that was sufficient to regain his wizard slaying abilities.  Inside Spellhold there was an oddity early on when Ragemage put down a cloudkill to try and kill some arriving umber hulks, but they just ignored it.  However, Miseri was under stealth and Forem used an invisibility potion while Ragemage did his tanking job.  The lich there put up a good fight in outlasting Ragemage's enrage, but a FoD failed to get past Ragemage's saving throw before it finally fell.  

Spoiler

There was a casualty soon after that though when Forem couldn't resist trying to finish off an illithid that appeared to be concentrating on Ragemage - unfortunately it switched targets and Forem's stupidity was plain for all to see as his brains were sucked out of his skull by a single hit.  

Spoiler

After the rod of resurrection had him back on his feet the next opponent was a beholder.  Fearing that from past experience Miseri was safely out of sight, but Forem was determined to get revenge for his death and stomped into the attack - at least he would have stomped if he hadn't been petrified.  

Spoiler

Fortunately there was no area damage flying around though and a scroll soon had him revivified.


There were no further problems in escaping Spellhold and moving into the confrontation with Irenicus.  However, multi-player seems to find that transition difficult and Gate70 dropped out of the game as we arrived.  That led to Forem making no real contribution, but Ragemage hit hard and Jon made a run for it immediately after Wanev's timestop ended - at which point Corey's connection also dropped!  

Spoiler

That left me in control of all 3 characters, but luckily a few murderers were not likely to cause any problems - and didn't do so.

Spoiler


Stats (cont from BG1)

Miseri, thief 15 / wizardslayer 13, 129 HPs (incl. 11 from ioun stone), 519 kills

Ragemage, mage 15 / berserker 9, 104 HPs (incl. 5 from Helm), 549 kills, 2 deaths

Forem, cleric 14 / kensai 11, 120 HPs, 545 kills, 6 deaths

Ragemage did well to hold on to his kills lead that session - helped by boots of speed getting him into action quickly.  Miseri now has his own boots and with his fighting abilities restored should be more competitive next time.  Though he's now the slowcoach of the party I still think Forem will be the one to beat in future sessions, however.


  • corey_russell, ussnorway, Tarsiz and 2 others like this

#15006
Grimwald the Wise

Grimwald the Wise
  • Members
  • 2,182 posts

Starface has entered Amn. :)


// Log of Currently Installed WeiDU Mods
// The top of the file is the 'oldest' mod
// ~TP2_File~ #language_number #component_number // [Subcomponent Name -> ] Component Name [ : Version]
~TOTDG/SETUP-TOTDG.TP2~ #0 #0 // Colours of Infinity: Tales of the Deep Gardens
~TOTDG/SETUP-TOTDG.TP2~ #0 #1 // NPC Reactions (Aerie, Viconia, Jaheira, Anomen, Haer'Dalis, Keldorn)
~DC/SETUP-DC.TP2~ #0 #0 // Dungeon Crawl: v9
~BACKBRYNNLAW/SETUP-BACKBRYNNLAW.TP2~ #0 #0 // Back to Brynnlaw mod for Baldur's Gate II: v5
~SELLSWORDS/SETUP-SELLSWORDS.TP2~ #0 #0 // The Sellswords mod for Baldur's Gate II: v5
~SETUP-COM_ENCOUNTERS.TP2~ #0 #0 // Chosen of Mystra's Encounters (Requires Throne of Bhaal)
~SETUP-COM_ENCOUNTERS.TP2~ #0 #1 // Would you like to install improved druid encounters?
~SETUP-COM_ENCOUNTERS.TP2~ #0 #2 // Would you like to install improved Shagbag encounters?
~SETUP-AMBER.TP2~ #0 #0 // Amber the NPC MOD for BGII:SoA: v4
~SETUP-AMBER.TP2~ #0 #1 // Multiplayer-friendly flirting for Amber: v4
~TASHIA/SETUP-TASHIA.TP2~ #0 #0 // Tashia NPC Mod -> Full version (ToB required): v1.3
~TASHIA/SETUP-TASHIA.TP2~ #0 #3 // Tashia Add-on Pack by Bri and Lord Ernie (English only, Tashia ToB Required) -> Baldurized Dialogues: v1.3
~TASHIA/SETUP-TASHIA.TP2~ #0 #5 // Alternate portrait for Tashia. -> Tashia's Alternate Portrait 2.: v1.3
~XAN/SETUP-XAN.TP2~ #0 #0 // Xan NPC MOD for Baldur's Gate II: v15
~XAN/SETUP-XAN.TP2~ #0 #1 // Install alternate class for Xan? -> Change Xan's class to Fighter/Mage: v15
~YASRAENA/SETUP-YASRAENA.TP2~ #0 #0 // Yasraena (BG2:SoA & TOB NPC) created by nethrin & Sillara of the Tamari: v16
~SETUP-ALORA.TP2~ #0 #0 // Chosen of Mystra's Alora NPC Mod: 1.5
~SAERILETH/SETUP-SAERILETH.TP2~ #0 #0 // Saerileth Romance Mod (BG2:SoA & TOB NPC) created by nethrin and Sillara: v18
~DEARNISE/SETUP-DEARNISE.TP2~ #0 #0 // de'Arnise Romance for Baldur's Gate II: v4
~SETUP-BANTERPACK.TP2~ #0 #0 // Pocket Plane Banter Pack for BG2: Shadows of Amn: V14
~SETUP-BANTERPACK.TP2~ #0 #1 // Install SOA Banter Accelerator script? (Increases the frequency of interparty banter): V14
~SETUP-BANTERPACK.TP2~ #0 #2 // Pocket Plane Banter Pack for BG2: Throne of Bhaal: V14
~IEPBANTERS/SETUP-IEPBANTERS.TP2~ #0 #0 // Extended NPC-NPC Interaction SoA: V4.2
~IEPBANTERS/SETUP-IEPBANTERS.TP2~ #0 #1 // Extended Minsc/Aerie Interaction ToB: V4.2
~IEPBANTERS/SETUP-IEPBANTERS.TP2~ #0 #2 // Imoen "Retrospection" dialogue for BGII: ToB: V4.2
~IEPBANTERS/SETUP-IEPBANTERS.TP2~ #0 #3 // Wake-Up dialogue for Anomen Romance (By David Gaider with additions from Kulyok): V4.2
~IEPBANTERS/SETUP-IEPBANTERS.TP2~ #0 #4 // NPC Conflict Revisions: V4.2
~IEPBANTERS/SETUP-IEPBANTERS.TP2~ #0 #5 // Restored Aerie/Jaheira/Anomen interjection in Underdark: V4.2
~UB/SETUP-UB.TP2~ #0 #1 // The Suna Seni/Valygar Relationship: v26beta2
~UB/SETUP-UB.TP2~ #0 #2 // Kalah and What He Was Promised: v26beta2
~UB/SETUP-UB.TP2~ #0 #3 // "Cat and Mouse" (Bodhi hunts you in Spellhold) by Ghreyfain: v26beta2
~UB/SETUP-UB.TP2~ #0 #4 // Gorje Hilldark and the Extended Illithium Quest: v26beta2
~UB/SETUP-UB.TP2~ #0 #5 // The Pai'Na/Spider's Bane Quest: v26beta2
~UB/SETUP-UB.TP2~ #0 #6 // Restored Crooked Crane Inn: v26beta2
~UB/SETUP-UB.TP2~ #0 #7 // Restored Encounters: v26beta2
~UB/SETUP-UB.TP2~ #0 #8 // Artemis Entreri in Bodhi's Lair: v26beta2
~UB/SETUP-UB.TP2~ #0 #9 // Corrected "Xzar's Creations": v26beta2
~UB/SETUP-UB.TP2~ #0 #10 // Restored Hell Minions, by SimDing0: v26beta2
~UB/SETUP-UB.TP2~ #0 #11 // Gorf the Squisher Fix, by Gebhard Blucher: v26beta2
~UB/SETUP-UB.TP2~ #0 #12 // Item Restorations: v26beta2
~UB/SETUP-UB.TP2~ #0 #13 // Yoshimo's Original Portrait: v26beta2
~UB/SETUP-UB.TP2~ #0 #14 // Anomen's Original Portrait: v26beta2
~UB/SETUP-UB.TP2~ #0 #15 // NPC Portrait Restorations: v26beta2
~UB/SETUP-UB.TP2~ #0 #16 // Corrected BAMs and Scripts: v26beta2
~UB/SETUP-UB.TP2~ #0 #17 // Corrected Character Names and Biographies: v26beta2
~UB/SETUP-UB.TP2~ #0 #18 // Restored Minor Dialogs: v26beta2
~UB/SETUP-UB.TP2~ #0 #19 // Restored Bhaalspawn Powers, by David Gaider: v26beta2
~UB/SETUP-UB.TP2~ #0 #20 // Extended ToB Item Descriptions: v26beta2
~UB/SETUP-UB.TP2~ #0 #21 // Throne of Bhaal Minor Restorations: v26beta2
~UB/SETUP-UB.TP2~ #0 #24 // Sarevok's Remorse: v26beta2
~UB/SETUP-UB.TP2~ #0 #25 // The Murder of Acton Balthis, by Kulyok: v26beta2
~ARESTORATIONP/SETUP-ARESTORATIONP.TP2~ #1 #0 // Restored Locations: v8.2.6
~ARESTORATIONP/SETUP-ARESTORATIONP.TP2~ #1 #1 // Restored Characters and Dialogs: v8.2.6
~ARESTORATIONP/SETUP-ARESTORATIONP.TP2~ #1 #2 // Restored Sounds: v8.2.6
~ARESTORATIONP/SETUP-ARESTORATIONP.TP2~ #1 #3 // Restored Items: v8.2.6
~ARESTORATIONP/SETUP-ARESTORATIONP.TP2~ #1 #4 // Restored Wish Options: v8.2.6
~ARESTORATIONP/SETUP-ARESTORATIONP.TP2~ #1 #5 // Restored XP for Minor Things: v8.2.6
~ARESTORATIONP/SETUP-ARESTORATIONP.TP2~ #1 #6 // Lich Deril: v8.2.6
~ARESTORATIONP/SETUP-ARESTORATIONP.TP2~ #1 #7 // Restored Random Encounters: v8.2.6
~ARESTORATIONP/SETUP-ARESTORATIONP.TP2~ #1 #8 // Minor Restorations: v8.2.6
~ARESTORATIONP/SETUP-ARESTORATIONP.TP2~ #1 #11 // Restored Final Slayer Dream: v8.2.6
~ARESTORATIONP/SETUP-ARESTORATIONP.TP2~ #1 #12 // Alternate Slayer Change: v8.2.6
~ARESTORATIONP/SETUP-ARESTORATIONP.TP2~ #1 #13 // Restored Waukeen's Promenade Cutscene: v8.2.6
~SETUP-DUNGEONBEGONE.TP2~ #0 #0 // Dungeon Be Gone V1.6
~KELSEY.TP2~ #0 #0 // Kelsey: V4
~KELSEY.TP2~ #0 #21 // Alternate portraits -> Install Alternate Kelsey portrait set #3, by Indi: V4
~SETUP-KETO.TP2~ #0 #0 // Keto-SOA NPC V2
~SETUP-KETO.TP2~ #0 #1 // Keto/Kelsey Interaction (Requires Kelsey-SOA)
~SETUP-NPCFLIRT.TP2~ #0 #0 // Aerie Flirt Pack For SOA: v1.03
~SETUP-NPCFLIRT.TP2~ #0 #1 // Aerie/Solaufein Romance Conflict For SOA (Solaufein V60 or greater recommended): v1.03
~SETUP-NPCFLIRT.TP2~ #0 #2 // Aerie Flirt Pack For TOB: v1.03
~SETUP-NPCFLIRT.TP2~ #0 #3 // Aerie/Solaufein Romance Conflict For TOB (Solaufein V60 or greater recommended): v1.03
~SETUP-NPCFLIRT.TP2~ #0 #4 // Jaheira Flirt Pack for SOA: v1.03
~SETUP-NPCFLIRT.TP2~ #0 #5 // Jaheira/Solaufein Romance Conflict For SOA (Solaufein V60 or greater recommended): v1.03
~SETUP-NPCFLIRT.TP2~ #0 #6 // Jaheira Flirt Pack for TOB: v1.03
~SETUP-NPCFLIRT.TP2~ #0 #7 // Jaheira/Solaufein Romance Conflict For TOB (Solaufein V60 or greater recommended): v1.03
~SETUP-NPCFLIRT.TP2~ #0 #8 // Viconia Flirt Pack for SOA: v1.03
~SETUP-NPCFLIRT.TP2~ #0 #9 // Viconia/Solaufein Romance Conflict For SOA (Solaufein V60 or greater recommended): v1.03
~SETUP-NPCFLIRT.TP2~ #0 #10 // Viconia Flirt Pack for TOB: v1.03
~SETUP-NPCFLIRT.TP2~ #0 #11 // Viconia/Solaufein Romance Conflict For TOB (Solaufein V60 or greater recommended): v1.03
~SETUP-NPCFLIRT.TP2~ #0 #12 // Anomen Flirt Pack for SOA: v1.03
~SETUP-NPCFLIRT.TP2~ #0 #13 // Anomen/Solaufein Romance Conflict For SOA (Solaufein V60 or greater recommended): v1.03
~SETUP-NPCFLIRT.TP2~ #0 #14 // Anomen Flirt Pack for TOB: v1.03
~SETUP-NPCFLIRT.TP2~ #0 #15 // Anomen/Solaufein Romance Conflict For TOB (Solaufein V60 or greater recommended): v1.03
~SETUP-D0QUESTPACK.TP2~ #0 #0 // General AI Improvements: v3.2
~SETUP-D0QUESTPACK.TP2~ #0 #2 // Creature & Area Improvements -> All Creature Improvements: v3.2
~SETUP-D0QUESTPACK.TP2~ #0 #4 // Miscellaneous Enhancements -> With Additional Random Encounters: v3.2
~SETUP-D0QUESTPACK.TP2~ #0 #5 // Additional Shadow Thieves Content: v3.2
~SETUP-D0QUESTPACK.TP2~ #0 #6 // Alternative Harper/Xzar Plot: v3.2
~SETUP-D0QUESTPACK.TP2~ #0 #7 // Extended Reynald Sequence: v3.2
~SETUP-D0QUESTPACK.TP2~ #0 #8 // Intrigue In The Copper Coronet: v3.2
~SETUP-D0QUESTPACK.TP2~ #0 #9 // Rahul Kanakia's Potion Quest: v3.2
~SETUP-D0QUESTPACK.TP2~ #0 #10 // Revised Hell Trials: v3.2
~SETUP-D0QUESTPACK.TP2~ #0 #12 // Improved Oasis II -> IO2 Dialogue Enhancement Only: v3.2
~SETUP-D0QUESTPACK.TP2~ #0 #13 // Saving Sanik In Brynnlaw: v3.2
~SETUP-D0QUESTPACK.TP2~ #0 #14 // Burglary Of The Bookkeeper: v3.2
~SETUP-D0QUESTPACK.TP2~ #0 #15 // New Fate For The Dryads' Acorns: v3.2
~SETUP-D0QUESTPACK.TP2~ #0 #16 // The Tragedy Of Besamen: v3.2
~SETUP-D0QUESTPACK.TP2~ #0 #17 // Further Slaver Involvement: v3.2
~SETUP-D0QUESTPACK.TP2~ #0 #18 // Sending The Solamnic Knights Home: v3.2
~SETUP-D0QUESTPACK.TP2~ #0 #19 // Nazariel The Lich: v3.2
~SETUP-D0QUESTPACK.TP2~ #0 #20 // Reward Negotiation: v3.2
~SETUP-D0QUESTPACK.TP2~ #0 #21 // Infernal Thievery: v3.2
~SETUP-BG2EEW.TP2~ #0 #0 // TeamBG's Weapons Pack for BG2:EE Version 1.01
~REUNION/SETUP-REUNION.TP2~ #0 #0 // The Reunion mod for Baldur's Gate II: v1
~TOD/SETUP-TOD.TP2~ #0 #0 // Tower Of Deception Mod (Requires Throne Of Bhaal)
~TOD/SETUP-TOD.TP2~ #0 #1 // Improved Astral Shard Guardian
~TOD/SETUP-TOD.TP2~ #0 #2 // Encounter with Ustrain
~SETUP-VAMPIRETALES.TP2~ #0 #0 // Vampire Tales (Requires Throne of Bhaal)
~SETUP-VAMPIRETALES.TP2~ #0 #1 // Improved Cult of the Unseeing Eye
~SETUP-VAMPIRETALES.TP2~ #0 #2 // Improved Harper Fight
~SETUP-VAMPIRETALES.TP2~ #0 #3 // CoM Store 1
~SETUP-ITEMUPGRADE.TP2~ #0 #0 // Shadows Of Amn Item Upgrades -> Original list version: v40
~SETUP-ITEMUPGRADE.TP2~ #0 #1 // Throne Of Bhaal Item Upgrades -> Original list version: v40
~BG2_TWEAKS/SETUP-BG2_TWEAKS.TP2~ #0 #1030 // Reveal Wilderness Areas Before Chapter Six: v16
~BG2_TWEAKS/SETUP-BG2_TWEAKS.TP2~ #0 #1040 // Improved Athkatlan City Guard: v16
~BG2_TWEAKS/SETUP-BG2_TWEAKS.TP2~ #0 #1070 // Improved Multi-Player Kick-out Dialogues: v16
~BG2_TWEAKS/SETUP-BG2_TWEAKS.TP2~ #0 #1080 // Add Bags of Holding: v16
~BG2_TWEAKS/SETUP-BG2_TWEAKS.TP2~ #0 #1120 // Stores Sell Higher Stacks of Items: v16
~BG2_TWEAKS/SETUP-BG2_TWEAKS.TP2~ #0 #1160 // Multiple Strongholds (Baldurdash) -> No Restrictions (Baldurdash): v16
~BG2_TWEAKS/SETUP-BG2_TWEAKS.TP2~ #0 #1170 // Bonus Merchants (Baldurdash): v16
~BG2_TWEAKS/SETUP-BG2_TWEAKS.TP2~ #0 #1180 // Female Edwina: v16
~BG2_TWEAKS/SETUP-BG2_TWEAKS.TP2~ #0 #1220 // Allow Cromwell to Upgrade Watcher's Keep Items: v16
~BG2_TWEAKS/SETUP-BG2_TWEAKS.TP2~ #0 #1230 // Allow Cespenar to Use Cromwell Recipes: v16
~BG2_TWEAKS/SETUP-BG2_TWEAKS.TP2~ #0 #2040 // Universal Clubs: v16
~BG2_TWEAKS/SETUP-BG2_TWEAKS.TP2~ #0 #2060 // Weapon Styles for All: v16
~BG2_TWEAKS/SETUP-BG2_TWEAKS.TP2~ #0 #2090 // Change Experience Point Cap -> Remove Experience Cap: v16
~BG2_TWEAKS/SETUP-BG2_TWEAKS.TP2~ #0 #2140 // Expanded Dual-Class Options: v16
~BG2_TWEAKS/SETUP-BG2_TWEAKS.TP2~ #0 #2151 // Wear Multiple Protection Items -> No Restrictions: v16
~BG2_TWEAKS/SETUP-BG2_TWEAKS.TP2~ #0 #2200 // Multi-Class Grandmastery (Weimer): v16
~BG2_TWEAKS/SETUP-BG2_TWEAKS.TP2~ #0 #2210 // True Grandmastery (Baldurdash): v16
~BG2_TWEAKS/SETUP-BG2_TWEAKS.TP2~ #0 #2300 // Triple-Class HLA Tables: v16
~BG2_TWEAKS/SETUP-BG2_TWEAKS.TP2~ #0 #2352 // Alter Multiclass Restrictions -> Install both of the above options: v16
~BG2_TWEAKS/SETUP-BG2_TWEAKS.TP2~ #0 #2360 // Remove Racial Restrictions for Single Classes: v16
~BG2_TWEAKS/SETUP-BG2_TWEAKS.TP2~ #0 #2372 // Alter Dual-class Restrictions -> Install both of the above options: v16
~BG2_TWEAKS/SETUP-BG2_TWEAKS.TP2~ #0 #2380 // Remove Racial Restrictions for Kits: v16
~BG2_TWEAKS/SETUP-BG2_TWEAKS.TP2~ #0 #3000 // Higher HP on Level Up -> Maximum: v16
~BG2_TWEAKS/SETUP-BG2_TWEAKS.TP2~ #0 #3010 // Maximum HP for NPCs (the bigg) -> For All Creatures in Game: v16
~BG2_TWEAKS/SETUP-BG2_TWEAKS.TP2~ #0 #3031 // Easy Spell Learning -> 100% Learn Spells and No Maximum Cap: v16
~BG2_TWEAKS/SETUP-BG2_TWEAKS.TP2~ #0 #3040 // Make Bags of Holding Bottomless: v16
~BG2_TWEAKS/SETUP-BG2_TWEAKS.TP2~ #0 #3050 // Remove fatigue from restoration spells: v16
~BG2_TWEAKS/SETUP-BG2_TWEAKS.TP2~ #0 #3080 // Unlimited Ammo Stacking: v16
~BG2_TWEAKS/SETUP-BG2_TWEAKS.TP2~ #0 #3090 // Unlimited Gem and Jewelry Stacking: v16
~BG2_TWEAKS/SETUP-BG2_TWEAKS.TP2~ #0 #3100 // Unlimited Potion Stacking: v16
~BG2_TWEAKS/SETUP-BG2_TWEAKS.TP2~ #0 #3110 // Unlimited Scroll Stacking: v16
~BG2_TWEAKS/SETUP-BG2_TWEAKS.TP2~ #0 #3120 // Happy Patch (Party NPCs do not complain about reputation) -> NPCs Are Never Angry About Reputation: v16
~BG2_TWEAKS/SETUP-BG2_TWEAKS.TP2~ #0 #3123 // NPCs Don't Fight: v16
~BG2_TWEAKS/SETUP-BG2_TWEAKS.TP2~ #0 #3125 // Neutral Characters Make Happy Comments at  Mid-Range Reputation: v16
~BG2_TWEAKS/SETUP-BG2_TWEAKS.TP2~ #0 #3160 // Keep Drizzt's Loot, Disable Malchor Harpell: v16
~BG2_TWEAKS/SETUP-BG2_TWEAKS.TP2~ #0 #3183 // Romance Cheats: v16
~BG2_TWEAKS/SETUP-BG2_TWEAKS.TP2~ #0 #3190 // Rest Anywhere (Japheth): v16
~BG2_TWEAKS/SETUP-BG2_TWEAKS.TP2~ #0 #4010 // Improved Fate Spirit Summoning: v16
~BG2_TWEAKS/SETUP-BG2_TWEAKS.TP2~ #0 #4031 // Consistent Stats: Edwin -> Use BG2 Values: v16
~BG2_TWEAKS/SETUP-BG2_TWEAKS.TP2~ #0 #4041 // Consistent Stats: Jaheira -> Use BG2 Values: v16
~BG2_TWEAKS/SETUP-BG2_TWEAKS.TP2~ #0 #4061 // Consistent Stats: Minsc -> Use BG2 Values: v16
~BG2_TWEAKS/SETUP-BG2_TWEAKS.TP2~ #0 #4071 // Consistent Stats: Viconia -> Use BG2 Values: v16
~BG2_TWEAKS/SETUP-BG2_TWEAKS.TP2~ #0 #4100 // Change Korgan to Neutral Evil: v16
~STRATAGEMS/SETUP-STRATAGEMS.TP2~ #0 #1000 // Initialise mod (all other components require this): v30
~STRATAGEMS/SETUP-STRATAGEMS.TP2~ #0 #4040 // Make party members less likely to die irreversibly: v30
~STRATAGEMS/SETUP-STRATAGEMS.TP2~ #0 #4180 // Make Freedom scrolls available earlier: v30
~STRATAGEMS/SETUP-STRATAGEMS.TP2~ #0 #5000 // Ease-of-use party AI: v30
~STRATAGEMS/SETUP-STRATAGEMS.TP2~ #0 #5010 // Move Boo into Minsc's pack: v30
~STRATAGEMS/SETUP-STRATAGEMS.TP2~ #0 #5900 // Initialise AI components (required for all tactical and AI components): v30
~STRATAGEMS/SETUP-STRATAGEMS.TP2~ #0 #6000 // Smarter general AI: v30
~STRATAGEMS/SETUP-STRATAGEMS.TP2~ #0 #6010 // Better calls for help: v30
~STRATAGEMS/SETUP-STRATAGEMS.TP2~ #0 #6020 // Add high-level abilities (HLAs) to spellcasters -> Only selected spellcasters in Throne of Bhaal get HLAs: v30
~STRATAGEMS/SETUP-STRATAGEMS.TP2~ #0 #6034 // Smarter Mages -> Mages cast short-duration spells instantly at start of combat on difficulty settings of Hard or higher: v30
~STRATAGEMS/SETUP-STRATAGEMS.TP2~ #0 #6044 // Smarter Priests -> Priests cast short-duration spells instantly at start of combat on difficulty settings of Hard or higher: v30
~STRATAGEMS/SETUP-STRATAGEMS.TP2~ #0 #6100 // Potions for NPCs -> All of the potions dropped by slain enemies are recoverable: v30
~STRATAGEMS/SETUP-STRATAGEMS.TP2~ #0 #6200 // Improved Spiders: v30
~STRATAGEMS/SETUP-STRATAGEMS.TP2~ #0 #6500 // Improved golems: v30
~STRATAGEMS/SETUP-STRATAGEMS.TP2~ #0 #6511 // Improved fiends -> Fiends have normal hit points: v30
~STRATAGEMS/SETUP-STRATAGEMS.TP2~ #0 #6530 // Smarter celestials -> Celestials have about 50 percent more hit points than normal: v30
~STRATAGEMS/SETUP-STRATAGEMS.TP2~ #0 #6541 // Smarter dragons -> Dragons have normal hit points: v30
~STRATAGEMS/SETUP-STRATAGEMS.TP2~ #0 #6570 // Smarter githyanki: v30
~STRATAGEMS/SETUP-STRATAGEMS.TP2~ #0 #6580 // Improved Vampires: v30
~STRATAGEMS/SETUP-STRATAGEMS.TP2~ #0 #6590 // Smarter Throne of Bhaal final villain: v30
~STRATAGEMS/SETUP-STRATAGEMS.TP2~ #0 #8000 // Make the starting dungeon slightly harder: v30
~STRATAGEMS/SETUP-STRATAGEMS.TP2~ #0 #8010 // Improved Shade Lord: v30
~STRATAGEMS/SETUP-STRATAGEMS.TP2~ #0 #8020 // Spellcasting Demiliches: v30
~STRATAGEMS/SETUP-STRATAGEMS.TP2~ #0 #8030 // More resilient trolls: v30
~STRATAGEMS/SETUP-STRATAGEMS.TP2~ #0 #8040 // Increase difficulty of level-dependent monster groupings -> Mildly increased difficulty: v30
~STRATAGEMS/SETUP-STRATAGEMS.TP2~ #0 #8050 // Improved Random Encounters: v30
~STRATAGEMS/SETUP-STRATAGEMS.TP2~ #0 #8061 // Improved de'Arnise Keep ("Tactics Remix") -> Enhanced spirit trolls (as in Tactics): v30
~STRATAGEMS/SETUP-STRATAGEMS.TP2~ #0 #8081 // Improved Bodhi (Tactics Remix) -> Original Tactics Improved Bodhi with SCSII scripting: v30
~STRATAGEMS/SETUP-STRATAGEMS.TP2~ #0 #8100 // Improved battle with Irenicus in Spellhold: v30
~STRATAGEMS/SETUP-STRATAGEMS.TP2~ #0 #8110 // Improved Sahuagin: v30
~STRATAGEMS/SETUP-STRATAGEMS.TP2~ #0 #8120 // Improved Beholder hive (adapted from Quest Pack): v30
~STRATAGEMS/SETUP-STRATAGEMS.TP2~ #0 #8140 // Slightly Improved Drow -> Upgrade Ust Natha's defences: v30
~STRATAGEMS/SETUP-STRATAGEMS.TP2~ #0 #8150 // Slightly Improved Watcher's Keep: v30
~STRATAGEMS/SETUP-STRATAGEMS.TP2~ #0 #8160 // Improved Fire Giant temple: v30
~STRATAGEMS/SETUP-STRATAGEMS.TP2~ #0 #8170 // Enhanced Sendai's Enclave: v30
~STRATAGEMS/SETUP-STRATAGEMS.TP2~ #0 #8190 // Improved Minor Encounters: v30
~SETUP-WMART.TP2~ #0 #0 // Deidre and Joluv in BG:EE
~SETUP-BGEEW.TP2~ #0 #0 // TeamBG's Weapons Pack for BG:EE, BGT and TuTu Version 1.04
~SETUP-BGEEAR.TP2~ #0 #0 // TeamBG's Armors for BG:EE, BGT and TuTu Version 1.05
~RECOLOREDBUTTONS/SETUP-RECOLOREDBUTTONS.TP2~ #0 #2 // Recolored character's toolbar buttons (BG2:EE): v4.1
~SETUP-UNDERREP.TP2~ #0 #0 // Underrepresented Items From Icewind Dale 2
~AURORA/SETUP-AURORA.TP2~ #0 #500 // PnP Helmed and Battle Horrors: v5
~AURORA/SETUP-AURORA.TP2~ #0 #520 // Realistic Kobold Commandos: v5
~AURORA/SETUP-AURORA.TP2~ #0 #9000 // Fix area creature references: v5
~VIC.TP2~ #0 #0 // Victor's Improved Races: v2.0
~VIC.TP2~ #0 #1 // Victor's Wizards Know Better(have more Lore): v2.0
~VIC.TP2~ #0 #2 // Faithful Rogue Kit for BGII: v2.0
~VIC.TP2~ #0 #3 // Lich Slayer Scimitar: v2.0
~VIC.TP2~ #0 #4 // The Djin Merchant: v2.0
~VIC.TP2~ #0 #5 // Burning Man kit for BG2(by Victor): v2.0
~VIC.TP2~ #0 #6 // Romance Friendly Imprisonment(by Galactygon): v2.0
~VIC.TP2~ #0 #7 // Lydia's scroll: v2.0
~VIC.TP2~ #0 #8 // Weapons for all: v2.0
~VIC.TP2~ #0 #9 // Victor's Special Encounters: v2.0
~VIC.TP2~ #0 #10 // Improved Bard Song: v2.0
~VIC.TP2~ #0 #11 // Improved Irenicus Dungeon(Not as difficult as Improved Ilyich): v2.0
~VIC.TP2~ #0 #12 // Grandpa's Shield quest: v2.0


I enjoyed the improved Irenicus' Dungeon. I have played another improved dungeon which was not such a challenge.


There were monsters around that couldn't be harmed with the weapons available. Therefore they had to be killed by magic. Starface could only defend herself whilst Imoen used spells.  If the party rested, the monsters returned to full health which meant working out the best spellbook to deal out sufficient damage.


I won't say more about the monsters as it would be too spoilerish for anyone wanting to use the mod. It was not TOO difficult, so Starface did the circus quest and the slaver quests unaided after buying a decent axe and armour. (Had to sell a load of potions in order to pay for them.) (After the slaver compound she bought Azuredge.)


She then joined up with Nalia and they are currently at the D'Arnise Stronghold. :)


  • ussnorway and Dyara like this

#15007
Grimwald the Wise

Grimwald the Wise
  • Members
  • 2,182 posts

The improved spirit trolls proved to be too much for Nalia, but Starface not only survived but killed them. :) However she decided not to go looking for any more until she had the help of Nalia again. Raising her made a big dent in her savings. She couldn't even afford to brible the cowled wizards to let Nalia cast magic in Amn. :(

The two of them decided to get a bit more experience before heading back to D'Arnise Stronghold.


  • ussnorway likes this

#15008
ussnorway

ussnorway
  • Members
  • 2,350 posts

Telling the crowled wizards to stick their magic licence is VERY gusty move wise… hope that works out for you mate.


  • corey_russell and Grimwald the Wise like this

#15009
Grimwald the Wise

Grimwald the Wise
  • Members
  • 2,182 posts

Telling the crowled wizards to stick their magic licence is VERY gusty move wise… hope that works out for you mate.


Last Update


Not so gutsy.

Just didn't use any spells outside until enough chests had been picked to purchase the licence.


Starface did the thievs' quest without difficulty. Took the bird to Xzar. Then joined up with Saerileth. Went to kill the dragon. Killed the shade Lord. So far not difficult.


Saerileth was kidnapped by a devil. Rescued her. Left her behind and went to D'Arnise. I couldn't work out how to dispose of the improved golem so left it.


The Umber Hulks are no longer a walkover. :( However disposed of the first lot. The improved Tor Gal party however was something else entirely. Tough!


Got trapped so that running wasn't an option. :( New tactics required.


PS Are the mage/umber hulk/spirit troll additions an addition from EE or from SCS?


  • ussnorway likes this

#15010
Aasim

Aasim
  • Members
  • 1,361 posts

PS Are the mage/umber hulk/spirit troll additions an addition from EE or from SCS?

SCS. Better luck next time...


  • Grimwald the Wise likes this

#15011
Grimwald the Wise

Grimwald the Wise
  • Members
  • 2,182 posts

Thanks.


In some ways I like some of the changes. In some ways I don't.


No more casting cloudkill and then shutting the door so they can't escape. They open the door and follow you. Have to use web as well now. Perhaps a bit more realistic, though in RL it would perhaps have been possible to barricade the door.


Knowing what to expect may make it easier next time.


#15012
Grond0

Grond0
  • Members
  • 6,498 posts

Gate70/Grond0 multiplayer attempt 101 - (update 1)

Sean, half-elf stalker (Grond0) & Joak, elf diviner (Gate70)


After completing their adventures on the Sword Coast this pairing had time yesterday to make some inroads into BG2.


They escaped from the dungeon without much fuss, though the Cambion did better than expected and forced Sean to switch to his bow.  

Spoiler

The circus similarly offered quick & easy rewards before they moved on to sort out the Copper Coronet.

Spoiler


Suna Seni made her last ambush before they hit their first obstacle while doing Mae'Var's tasks.  Typically you wouldn't expect a mage to act as a sacrificial offering, but Joak seemed happy to play target for Rayic Gethras while Sean fired off some acid arrows.  That resulted in her being scared, stunned and finally suffering a first death courtesy of a FoD, while Sean was wearing Rayic down with acid arrows.  

Spoiler

Joak's view of the encounter - "job done" :blink:.  The remaining tasks were soon done and Mae'Var himself offered little challenge.

Spoiler


Renfeld was saved next, opening up a challenge from Prebek.  The intention there was for Sean to shoot the goblins before a co-ordinated attack on the mages.  However, a failure to properly target the second goblin resulted in him moving into view of the mages.  He made a rapid exit, leaving Joak to their tender mercies.  That resulted in her being held, but her stoneskins lasted long enough this time for Sean to deal with the opposition.

Spoiler


After looting the harpers Sean saw Sansuki begging for help, but turned a deaf ear to his pleas on the grounds of an urgent appointment with the Fallen Paladins.  Joak was complaining there of not being able to do much (not having paid for a license yet), but was reminded she had a shiny fire wand - and some well-targeted scorchers from that left Sean with the need for only a few blows to finish things off.

Spoiler


Gaelan Bayle was given some money, which netted a nice reward with the amulet of power.  After buying the potion case at Watcher's Keep the amulet was put to the test against a pair of vampiric wraiths.  The first attempt, using Azuredge as a melee weapon, failed to do any damage and 2nd & 3rd attempts were no better - the wraiths draining attacks keeping pace with any damage caused to them, while they made the odd saving throw against being destroyed.  Joak was minded to give up, but then wondered if the wraiths would be able to hit a wraithform - they couldn't, which proved costly for them.  

Spoiler

The top level was then cleared with the exception of the statues, although Joak did have one near escape when strength drained to 2 by shadows (Sean having been concentrating on killing wraiths before turning to the shadows almost too late).

Spoiler


Sean, stalker 10, 129 HPs (incl. 5 from Helm), 142 kills

Joak, diviner 11, 53 HPs, 27 kills, 1 death


  • corey_russell, ussnorway, Serg BlackStrider and 2 others like this

#15013
Jianson

Jianson
  • Members
  • 377 posts

Martha, level 13 half-elven Totemic Druid, adventuring in Chapter 2 with Jaheira, Minsc, Yoshimo and Aerie


Some progress and a major retreat.


I'll take the retreat first. My gang has been to Windspear Hills and started the major quest there (and returned the acorns. Phluafae and her posse hadn't shown up this playthrough - I gotta try that option just once where you eat the dryads' acorns...).


Windspear Hills dungeon is a strange mix of wimpy and powerful creatures. I had forgotten that the Ruhk Transmuter is such a high-level spellcaster and that Vampiric Mists are super annoying and can see the invisible. But we beat all of that, plus the first batch of golems. The mod change that makes Iron Golems capable of throwing the poison clouds didn't add to my enjoyment - it made it more tedious. I still used a doorway, then I had Yoshimo fire Tansheron arrows from the shadows. They did 1-5 damage to the IG, so many shots were needed. Good thing the golem didn't seem to regenerate. The smaller golems were beaten pretty easily with Jaheira tanking and my archers firing (at the non-Clay ones).


Yoshimo scouted out a large pack of vampires. Those are SCS 'improved' vampires, with powers partly unknown to me. I presumed that at least the Ancient/Elder Vampires would be at least on par with Tanova in badassery, so I was of course wary. As you may have read, Tanova, almost by herself, kept my whole party busy.


I had a plan, but I didn't get to execute it properly because one of the vampires had been wandering a bit and spotted Minsc before I wanted it to. Oh well, I still had him take position in a doorway and duke it out. He was buffed with speed, Remove Fear, PfE, Chaotic Commands, NPP (Jaheira cast it on him just as the fight started), Genius and Mind Focusing potions (to prevent that 'Minsc the vegetable' thing that Tanova did). How did he fare? Let me put it this way: not well!


Martha185%20stopped_zpsc9f0ckzo.jpg


That inviso potion saved his life. 2 HP and 6 Constitution left. Each blood drink drains 3 CON, it seems. I do not know if the blood drinking is applied with a physical attack (like the level drain is) or if it's more magical. I also have no idea how to protect against it. Will absurdly good AC help? PFMW? Spell Immunity: Necromancy? Fortitude potion only sets base CON to 18, right? That would only have made Minsc able to survive one more such attack. He would have needed something like one of those Rings of Sustain Ability from Nethack...


Minsc chewed several Goodberries. Aerie stepped in with sawblades.


Martha186%20blades_zpszia0bjpe.jpg


That did pretty well, but not good enough to kill the ancient vampire lady (she had regenerated from Badly Injured to Barely Injured in just a few rounds). She did something called 'Mesmerize' at Aerie, even when Aerie was in Sanctuary. Thankfully, Aerie saved against it, whatever it was. I spotted a regular vampire at Near Death. Minsc, still with good mental protections up, nailed it with a +2 arrow. So one down, 6 or so to go. Aerie recast Sanctuary and we pulled back, out of the dungeon. Be back later, when we're more powerful...


We took a little vacation in Trademeet and had Mazzy join us again, so we could do the Gorf quest in the Slums. Visited Bridge district and beat up Valeria's gang with traps and strong summons. Nice find here, the +3 'Blackblood' club, one of the best weapons in SoA for Jaheira. No need for any special ammo, Flame Blades or MMMs now to finish off trolls. I used my lamp wish to start the 'Gong' quest. Will be nice to have something extra to do on my next visit to my stronghold in the Grove.


I've also made my first visit to the Temple District. Yoshimo robbed the Talos temple of a Wand of the Heavens and an ADHW scoll. Not bad. Signed up for three quests (Unseeing Eye, Sir Sarles, Fallen Paladins). Defeated Rakshasa in the Sewers. Yoshimo ate a round of Cloudkill and a Skull Trap, then a fire elemental beat up the Rakshasa. Took a long time but it won, a little worse for wear.


We did a well planned assault of the Sewers party. Yoshimo had thrown traps at the edge of the party from all three directions, plus laid some regular traps in the direction from where we were going to attack. Five strong summons (two fire elementals, a sprit snake, an Aerial Servant and an Invisible Stalker) were Hasted. Aerie threw a Skull Trap and I sent in the summons.


Martha187%20sewers%20party_zpspryzjnk6.j


That barrage eventually killed everyone except Gaius (the mage). He was still uninjured (and Silenced but also Vocalized...) after all my summons were dead. I sent in another spirit animal (snake again), another elemental and the efreeti from bottle. But it was the poison from Yoshimo's regular traps that did most of the work. That part of the damage bypasses Stoneskin. Gaius was defeted, yay!


We bought the broken Spider's Bane for PaiNa, saved Roger the Fence from sea troll and started Jadarath's potion quest. I plan to go all the way with it this time. From what he tells me, he may well be transformed into a demon or something if he gets all the potions. I've given him 7 of the 12 potion types he wants.


Oh yeah, Martha and her lover Aerie have also had a fantastic evening with dinner, fireworks, and (fake) adventures. It cost a pretty penny but Aerie liked it and the experience boosted us.

(Yup, I have 'gender' romance cheats installed. Good idea, but it's annoying when Aerie refers to Martha as 'him'.).


Haven't tried the Aerie romance before (this is actually the longest I've ever kept her in the party). You really need to treat her like a very delicate flower, providing almost unending support. I've found it rewarding to see her growing confidence - almost happiness, even. She really was way down at the bottom a while ago.


  • ussnorway, Serg BlackStrider, Grond0 and 2 others like this

#15014
Grond0

Grond0
  • Members
  • 6,498 posts
Phantasmic 6 {52} - monks party (update 3)
 
Without going back to the City, the monks moved on from de'Arnise to Umar Hills.  They quickly did a few tasks around the town before heading for the ruined temple.  That proved probably the easiest work the monks have done to date.  A couple of characters were paralysed by shadow fiends, but not in dangerous situations and the undead were only led by skeleton warriors.  Rather than give the Shade Lord a chance the monks just bounced in and out of his area using slings (with a sunstone bullet for the altar) - they stayed slightly longer on their last visit when the Shade Lord had a morale failure and his aura drained some levels, but that's only temporary.  That took the party to level 11, but even with that increase in power, I decided not to try the same trick on Thaxy for now.  One nice thing though is that monks are now immune to poison.  As they've not been allowed to use healing potions or antidotes, poison has been one of the biggest dangers to them so far.
 
After picking up Valygar's body the monks reported back to Umar before going to spend some of their gains on Adratha's potions.  With those bagged they then attacked the rakshasas - once more popping in and out of their house to avoid a host of lethal spells.
 
Arriving back at Athkatla they headed for the temple sewers.  They had their first encounter there with a beholder, supported by a couple of gauths, and they only just all survived - requiring favourable saving throws in addition to the danger of damage taken.  
Spoiler
The rakshasa was also potentially dangerous, but only managed 1 skull trap before being stunned.
Spoiler
 
Moving on through the sewers, Mekrath failed to get his buffs up in time to avoid being stunned.  His yuan-ti guards were harder to deal with though and precision was needed while bouncing up and down the stairs avoiding spells from the 3 mages (who were regularly following them).  
Spoiler
Carrying on they opened up the Unseeing Eye quest - Spectre making a first use of the RoAC to ensure disaster didn't strike from the prismatic spray trap.  There were 3 beholders and a pair of gauth waiting at the bridge.  The efreeti damaged them quite severely and a first use of the Necklace of Missiles helped wear them down to the point that stealth attacks could finish them off.  On into the pit, where the undead were still led by skeleton warriors and no problem.
 
The beholders in the nest were much more of a challenge.  The first gauth was totally isolated and could safely be attacked, but with calls for help operational that was not an option for most of them.  I was originally intending to use fireballs from the shadows and try and draw one of two of them away at a time, but I got a bit impatient when attacking the large group of beholders - trying to take advantage of quite a successful Bhaal horror - and Spook ran in terror, straight into the blind priests!
Spoiler
Fortunately though he ran away again and everyone was able to regroup around the paralysed Spirit and kill the first couple of priests to arrive - the other four then helpfully waited just out of sight until all the monks were well again and could crush the opposition.
Spoiler
After resting and clearing the remainder of the area the monks took on the Eye itself.  Despite the use of the rod it still used a chain contingency to summon a couple of death tyrants and protected itself with PfMW.  That kept it alive while Spectre was paralysed and killed,
Spoiler
then Phantom was petrified while the Eye still somehow hung on at near death.
Spoiler
It had taken over 50 damage from sling shots with non-magical bullets while at near death status, so I was suspicious that it was waiting for some script trigger at this point - and while writing this up I've just checked in Shadowkeeper that it's only supposed to have 160 HPs, so there was definitely something funny going on.  Retreating deeper into the cave allowed the remaining monks to hide and stage a stealth attack on one of the death tyrants - that succeeded, though at a heavy cost. Spook succumbed to a death ray and then was petrified while dead (which counts as a chunking).
Spoiler
 
Continuing that sequence Chimera was held while trying to run away after launching a sling bullet, then Spirit was petrified - but Wraith finally got a killing blow through the Eye's defenses.  
Spoiler
Wraith then tried to get past the final death tyrant with the aim of dragging it away from Chimera, but was held before she could make it.  However, as she died it became apparent that Chimera was just far enough round the bend of the corridor to be out of sight anyway.  
Spoiler
When he recovered he put the remainder of the party back together (stealth shots dragging the death tyrant away to allow him to revive the stoned characters).  After resting, the efreeti badly damaged the tyrant (with a couple of long distance fireballs and two flame arrows from invisibility), encouraging the monks to have a go at it with stealth attacks - though that still cost Spirit another life.
Spoiler
 
I would normally have ended the run when Spook was chunked (on the grounds that this was intended to be a full-party challenge), but given:
- the cheesy manner of the Unseeing Eye's survival to wreak havoc
- the fact that the original intention of the run was already compromised in BG1
- and the amount of work involved to get the run even this far :P
I think I'll continue for now.  That doesn't of course mean that I won't get killed immediately in the next session when trying something even crazier than usual ...
 
Stats (cont. from BG1)
Chimera - L11, 64 HPs (incl 5 from ioun stone; 5 from amulet), 230 kills
Spectre - L11, 64 HPs, 343 kills, 2 deaths
Phantom - L11, 76 HPs, 264 kills, 1 death
Wraith - L11, 75 HPs, 217 kills, 2 deaths
Spirit - L11, 63 HPs, 226 kills, 2 deaths
Spook - chunked at L11

  • ussnorway, Serg BlackStrider, Grimwald the Wise and 3 others like this

#15015
Dyara

Dyara
  • Members
  • 330 posts

Each blood drink drains 3 CON, it seems. I do not know if the blood drinking is applied with a physical attack (like the level drain is) or if it's more magical. I also have no idea how to protect against it. Will absurdly good AC help? PFMW? Spell Immunity: Necromancy? Fortitude potion only sets base CON to 18, right? That would only have made Minsc able to survive one more such attack. He would have needed something like one of those Rings of Sustain Ability from Nethack..

It's a physical attack (and completely ridiculous in my opinion - not the blood drinking per se but how it is done) so (very) good AC and of course PfMW helps (and not being immune to level drain :D).


  • Aasim likes this

#15016
Aasim

Aasim
  • Members
  • 1,361 posts

 completely ridiculous in my opinion 

Seconded. I made a little mod that removes this ability from their claws (they still heal themselves as they hit you) but CON drain is out. Then again, vanilla Pro Undead scrolls are so cheap that vamps are nothing more then XP harvest.


  • Jianson and Dyara like this

#15017
Dyara

Dyara
  • Members
  • 330 posts


Seconded. I made a little mod that removes this ability from their claws (they still heal themselves as they hit you) but CON drain is out. Then again, vanilla Pro Undead scrolls are so cheap that vamps are nothing more then XP harvest.

I had changed it to 1 attack/round only (was 4 I think - just wondering how to drink blood 4 times within 6 seconds :D), a saving throw was allowed (albeit with a penalty up to -8 depending on the power of the vampire), the con loss was changed (-1 up to -4 depending on the power of the vampire) and the duration was toned down a little bit also. Tried to mimic D&D the blood drain ability:


Blood Drain

A vampire can suck blood from a living victim with its fangs by making a successful grapple check. If it pins the foe, it drains blood, dealing 1d4 points of Constitution drain each round the pin is maintained. On each such successful attack, the vampire gains 5 temporary hit points.


  • Grond0, Grimwald the Wise and Blackraven like this

#15018
Grond0

Grond0
  • Members
  • 6,498 posts
Phantasmic 6 {52} - monks party (update 4)
 
Back in the Bridge District Spectre used the sewer cloak for the first time to take rat shape and went invisibly to confront the Rune Assassins (to draw out their backstabs).  Once they were out of invisibility potions they were easy victims for the rest of the monks and the ghasts and bone golem downstairs were no problem.
Spoiler
 
Still in the Bridge District they used the RoAC to trigger the trap on the lich tomb - getting a warning from the Cowled Wizards in the process, so will need to be careful about any further use.  They then called on Captain Dennis, where summons did some initial damage before they did a bit of stealthy stair hopping to finish things off.
Spoiler
The Boomerang dagger would have been a nice weapon for Spook, but he was the only one who had dagger proficiency.  However, it wouldn't be long before the remaining monks got the chance to add that to their abilities.
 
Now that the monks were immune to domination, the vampyre in the southern tombs was no longer a particular problem
Spoiler
and with that dead the monks quickly cleared the remainder of the area - the only problem when Spirit auto-followed another mummy after killing one and went through a petrification trap.  A couple of the monks were now ready for level 12, but the deaths in the beholder area meant there's now a big gap in XP.  Rather than wait for the others to catch up gradually though they decided to get some easy XP by paying Gaelan Bayle.
 
A bit more quick XP followed when Lassal didn't last long, though he did manage to require the use of a restoration scroll on Spectre.  The Guild Contact then pointed the way to the vampire HQ, but the monks decided not to follow up on that for now.  Instead they decided to try their luck with a bit of lich hunting.  That started with the Shade Lich.  Surprisingly that failed to dispel Spectre's PfU and Spectre withdrew before summoned fiends saw him.  The lich appeared to be drawn to the rest of the monks by the exit, but Spectre constantly moved to bar its way while attacking intermittently and managed to kill it before it got in range to attack the others.
Spoiler
There was a broadly similar strategy against the Elemental Lich, though this time Spectre had to use 2 scrolls after the first was dispelled.  He also got some use out of darts of wounding to finish the lich off with poison.
Spoiler
 
The City Gates lich and Kangaxx still seemed too dangerous to tackle, so instead the monks headed for the Planar Prison.  Entering under stealth allowed them to dispose of the Bounty Hunter mage
Spoiler
and the rest of his companions quickly died as well.  After briefly showing themselves to the yuan-ti to the east one of the mages followed them and unfortunately his first spell proved fatal for Wraith.  He was stunned before he had a second chance to cast though and Chimera used the RoR to bring Wraith back from the dead.  Neither of the other yuan-ti mages did any damage as the monks worked round towards the Master of Thralls.  The mage thrall did manage to confuse Chimera and Phantom, but with everything else nearby already dead that wasn't a great problem.
 
Moving on round I didn't fancy the monks chances against the Master's death gaze, so Spectre took potions of both invulnerability and stone form while going to scout.  I realised the others weren't safe though when the demon teleported to Spectre and she went into combat to try and occupy its attention.  With a bit of help from the efreeti that was an even contest.  The other monks decided with the demon at near death they would try and help out, but Spectre was just able to finish things off herself.
Spoiler
 
Spectre took troll shape to get her health back while the others beat up the air elementals and broke the orb.  Spectre then sniped at the Warden from distance with her sling, successfully interrupting numerous spells and ultimately killing him.  
Spoiler
Chimera then made several of the yuan-ti guards flee in terror to make finishing things off simple.
 
Having found the Planar Prison easier than expected, the monks will push their luck a bit and try out the Planar Sphere next :unsure:.
 
Stats (cont. from BG1)
Chimera - L12, 66 HPs (incl 5 from ioun stone; 5 from amulet), 252 kills
Spectre - L12, 66 HPs, 374 kills, 2 deaths
Phantom - L12, 78 HPs, 284 kills, 1 death
Wraith - L12, 77 HPs, 228 kills, 3 deaths
Spirit - L12, 65 HPs, 242 kills, 2 deaths
Spook - chunked at L11

  • ussnorway, Serg BlackStrider and Dyara like this

#15019
Jianson

Jianson
  • Members
  • 377 posts

Then again, vanilla Pro Undead scrolls are so cheap that vamps are nothing more then XP harvest.


Minsc_zpsoj5ntne4.jpg 


"Strange piece of paper helps? Minsc can not read, but his witch can. And then scary dancing spooky women will be no more. Look at Boo, he's trembling with excitement!"


  • Serg BlackStrider, Grimwald the Wise and Dyara like this

#15020
Aasim

Aasim
  • Members
  • 1,361 posts


"Strange piece of paper helps? Minsc can not read, but his witch can. And then scary dancing spooky women will be no more. Look at Boo, he's trembling with excitement!"

Yeah, it does help. Just take care -

1) SCS vampire mages will use Remove magic against it. 

2) some vamps will be "hidden" so use some anti-illusion spells as well


  • Grimwald the Wise likes this

#15021
Grimwald the Wise

Grimwald the Wise
  • Members
  • 2,182 posts

Yeah, it does help. Just take care -

1) SCS vampire mages will use Remove magic against it. 

2) some vamps will be "hidden" so use some anti-illusion spells as well


That too sounds scary.


#15022
Grond0

Grond0
  • Members
  • 6,498 posts
Phantasmic 6 {52} - monks party (update 5)
 
In the Planar Sphere the monks proceeded cautiously - typically using long range shots to lure individuals away from their companions into massed stealth attacks.  That avoided any danger from the tendency for SCS casters to use area effect spells centered on themselves when stealth attacks were being used and there was safe, if slow, progress through the halflings.  There were only stone golems past them - I'm used to being higher level and having an iron or adamantite one present.  There was a reminder of the fragility of life though when I accidentally double-clicked on the number puzzle and released a trap :wacko:.  
Spoiler
Immediately after that the monks completed it properly to get everyone to level 13 (gaining the death touch ability).
 
They stayed by the exit against Lavok and just bounced in every now and then attacking in between his protection spells (he had all of mantle, improved mantle, absolute immunity and PfMW) until he'd had enough.  
Spoiler
After that they once more went demon hunting.  The first Tanar'ri proved a bit more durable than I expected and Chimera had to get involved to finish it off.  
Spoiler
Spectre had taken a potion of invulnerability before initially contacting that, but didn't do so when exploring further - and she was immediately held by the second Tanar'ri.  Phantom managed to drag the demon around for a bit though while the others finished off various imps and mephits and a combined attack then succeeded.  
Spoiler
After circling the last demon to draw out most of the invisible Maurezhi they did a group assault - and a quivering palm claimed a first victim :devil:
Spoiler
 
Back inside they rested up before getting a second - Tolgerias failing to trouble the scorers.  
Spoiler
There was though a death shortly after that when I was trying to kill the noble efreeti before it went ethereal and didn't check Wraith's pathfinding properly - as a result she failed to run away with the others after being caught in a fire storm and was finished off by further attacks.  
Spoiler
With everything else dead the noble efreeti was still a danger with its large stock of fireballs and flame arrows and it was a welcome relief when it was finally stunned.
Spoiler
The cold room offered no similar challenge - the snow troll being disposed of with a quivering palm.
 
The engine room was actually a potential challenge, given the possibility of 3 different groups of golems all converging at once.  However, seeing that starting to happen (with juggernaut golems in the lead), the monks immediately ran away and used stealth to pop back a couple of times until the odds were to their liking.  
Spoiler
After repowering the engine they then escorted Lavok outside to say his farewells.
 
Stats (cont. from BG1)
Chimera - L13, 68 HPs (incl 5 from ioun stone; 5 from amulet), 274 kills
Spectre - L13, 68 HPs, 393 kills, 2 deaths
Phantom - L13, 80 HPs, 304 kills, 1 death
Wraith - L13, 79 HPs, 240 kills, 4 deaths
Spirit - L13, 67 HPs, 263 kills, 2 deaths
Spook - chunked at L11

  • ussnorway, Serg BlackStrider, Grimwald the Wise and 2 others like this

#15023
Dyara

Dyara
  • Members
  • 330 posts

Some real life issues had prevented me from playing regularly but now it's time to continue my noreload BG1 run from Feb/Mar this year :).

Dyara (Fighter/Mage/Thief)

Installation is BG2EE (v1.3), Ascension, SCS (v30 including some minor changes and bug fixing) and some others mods (see weidu log)

Spoiler

001-Dyara.jpg?raw=1&dl=0

When fighting the summoned Ogre Mage Dyara had some minor problems as she failed a save vs. hold spell, fortunately however the ogre mage didn't abuse the situation but waited for the spell to wear off. Other than that the first level of the starting dungeon proved rather easy (the larger group of mephits on the elemntal plane of air was ignored, though)...

Spoiler

For releasing the genie Dyara got back her old Burning Earth+1 long sword (I decided against Varscona+2 because Burning Earth has +4 enchantment and it's better when fighting trolls and undead).

Things went smoothly as well on the second level. An ogrillon was used as bait and with the mephits out of the way the mephit portals were easy prey...

Spoiler

Ulvaryl escaped unfortunately and then Dyara made it to the surface.


Name     Level                           HP           Game Kills XP     Game Kills  Strongest Kill   Deaths Pips
Dyara:   Fighter(7)/Mage(8)/Thief(8)     74 (+5)          63.280            73      Cambion          -      Longsword(**),Flail(**),TWF(**)

 
To be continued...


  • ussnorway, Serg BlackStrider, Grond0 and 1 other like this

#15024
ussnorway

ussnorway
  • Members
  • 2,350 posts

SEE2- Start,


A new look,


Hear text as mp3,


I’m re-entering the challenge with Sarah Brightlight... a half-elf Sharman.


Mods: this is a dragonspear run with no mods (for the DS game)… I play on hard with extra damage turned off.


The bg2ee is the same mods I had for PUK.


It has been suggested whilst I lavished in prison that I look a lot like my sister Imoen… I was surprised to learn there is considerable truth to this and have decided to have a  makeover.


s1-eed056.jpgs1-eed057.jpg


p.s, some sicko kidnapped us and is torturing me but that’s beside the point and I’m sure to break out soon… I’ve been to the nine hells and back after all!


Spoiler


  • Grimwald the Wise and Dyara like this

#15025
ussnorway

ussnorway
  • Members
  • 2,350 posts

Update; my scs30 build is incompatible with patch 2 so I have dropped mods and reset the game to “legacy of Bhaal”
Progress is slow but interesting… when 3 fireballs may kill a goblin you have to get creative with your tactics.


  • Grond0, Grimwald the Wise and Dyara like this